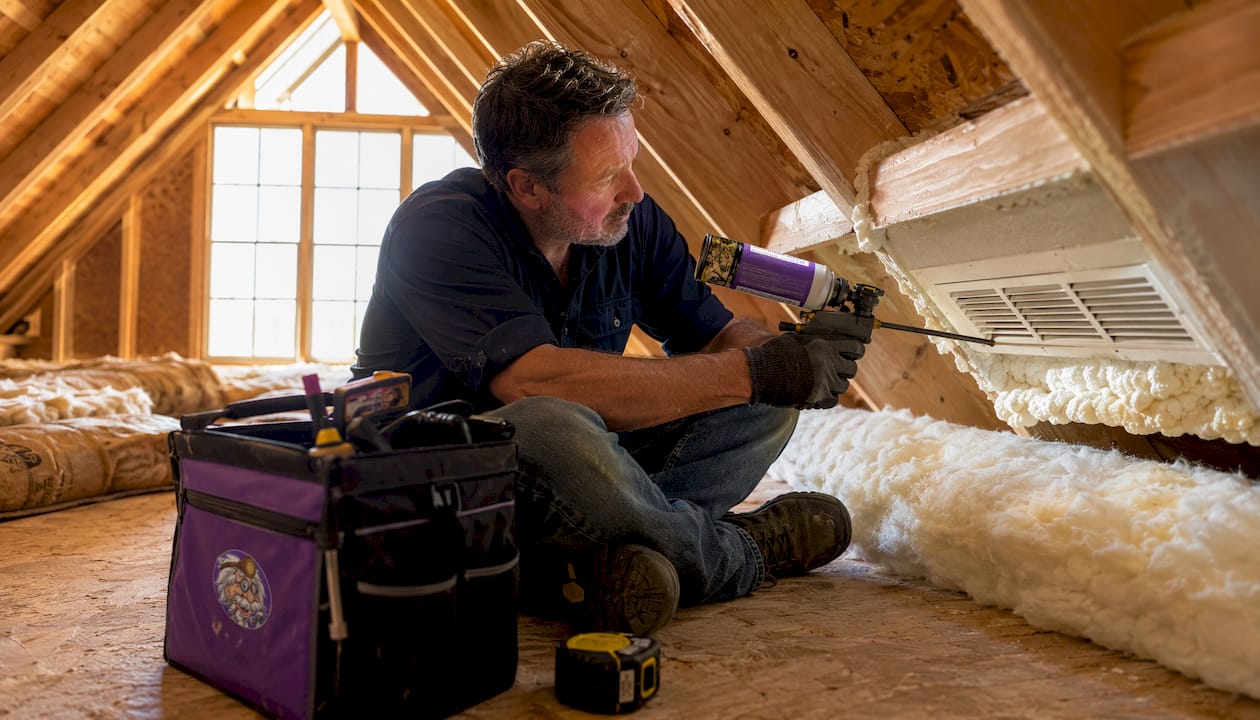
Air seal first, then add insulation to at least R‑49 in most U.S. climates, and keep your ventilation intact. That sequence, done in that order, is what actually moves the needle on your energy bills. EPA and ENERGY STAR estimate homeowners can save roughly 15% on heating and cooling costs by air sealing and insulating key areas like the attic. Most homeowners skip straight to insulation and wonder why their bills barely budge.
TL;DR: Seal the big bypasses first (top plates, can lights, attic hatch, plumbing chases), then blow in insulation to your climate zone’s R-value target. Expect to cut heating and cooling costs by roughly 15% when both steps are done right.
Priority actions:
- This weekend (DIY-friendly): Inspect your attic, measure existing insulation depth, and seal the attic hatch with rigid foam and a gasket.
- Soon (DIY or pro): Seal top plates, plumbing chases, and recessed lights with caulk, spray foam, or rigid foam boxes before adding any insulation.
- Schedule a pro: Blown-in insulation to R‑49 or higher, duct sealing, and a blower-door test to confirm results.
Table of Contents
- Why does the attic affect your whole home’s energy use?
- Whole-house energy efficiency: your attic action checklist
- How to air-seal your attic: the leaks that matter most
- What insulation type and R-value should you use?
- How do you keep attic ventilation working after adding insulation?
- Common attic insulation mistakes that cost you money and safety
- What does attic insulation actually cost, and when does it pay back?
- How to prepare your attic safely before any work begins
- When should you hire a professional instead of doing it yourself?
- How to find rebates and tax credits for attic insulation
- Key Takeaways
- The case for sealing first: a perspective on what actually works
- The Attic Genius can handle the whole project for you
- Useful sources and further reading
Why does the attic affect your whole home’s energy use?
The attic is the single biggest energy weak point in most American homes. Heat moves toward cold, so in winter your heated air rises and escapes through every gap in the ceiling plane. In summer, a sun-baked attic can hit 150°F and radiate heat downward into your living space all day. Either way, the attic is working against your HVAC system around the clock.
There are two separate problems happening at once. Conductive heat transfer is what insulation slows down. Convective air leakage is what air sealing stops. Insulation without sealing is like wearing a wool sweater with the zipper open. The ENERGY STAR guidance frames it exactly that way: sealing is closing the zipper, insulation is the sweater. Without sealing, insulation performs far below its rated R-value because warm air bypasses it entirely through gaps and penetrations.
ENERGY STAR / EPA estimate: Adding insulation and air sealing in key areas like the attic can save homeowners an average of 15% on heating and cooling costs, or about 11% on total home energy costs.
Beyond energy bills, a properly sealed and insulated attic controls moisture and humidity, reduces ice dams in cold climates like Chicagoland, and cuts down on dust and pest infiltration. Those comfort improvements are often what homeowners notice first, even before they see the utility bill drop.
Secondary benefits of attic air sealing and insulation:
- Fewer cold drafts and hot spots on upper floors
- Reduced ice dam risk along rooflines
- Better humidity control and lower mold risk
- Less dust and fewer insects entering through ceiling gaps
Whole-house energy efficiency: your attic action checklist
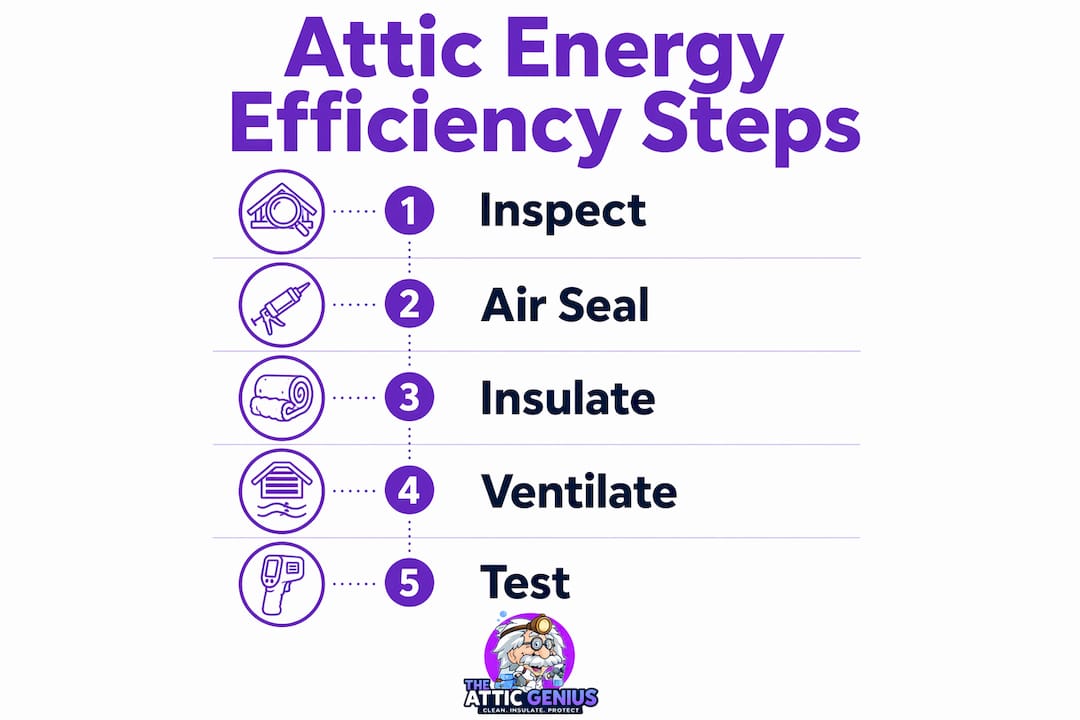
Follow this sequence. Skipping steps or reversing the order is the most common reason attic projects underperform.
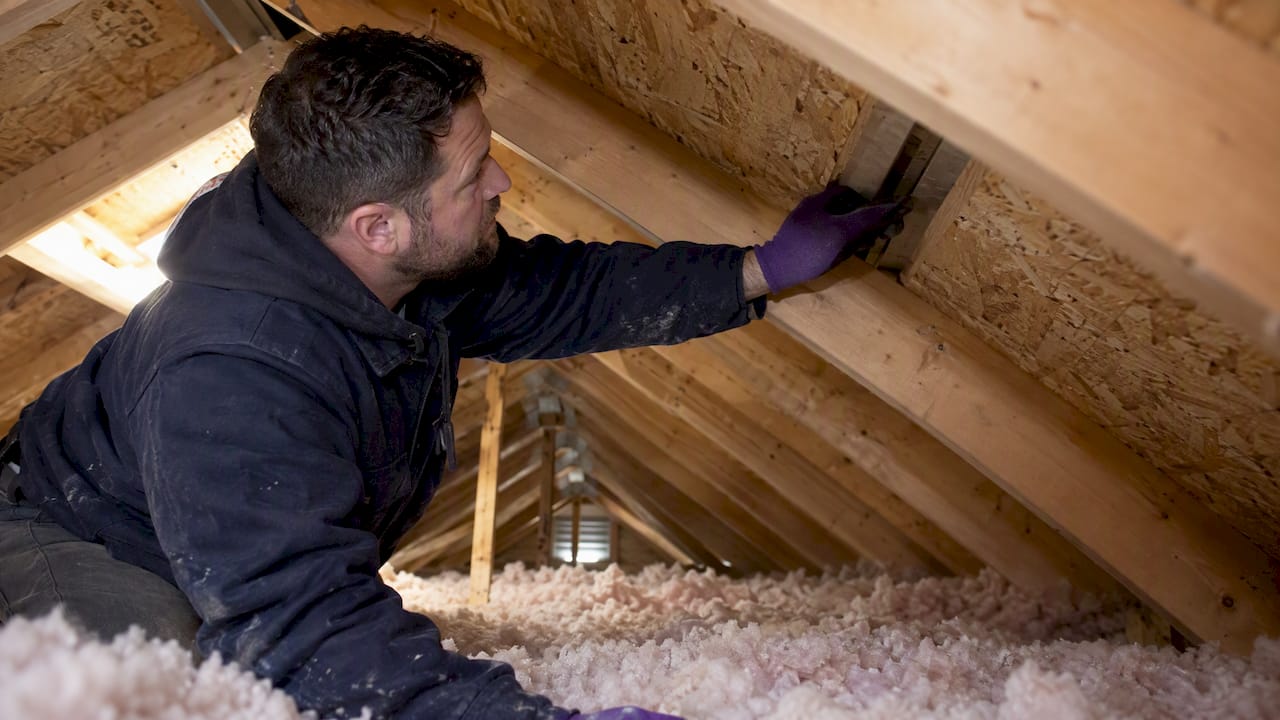
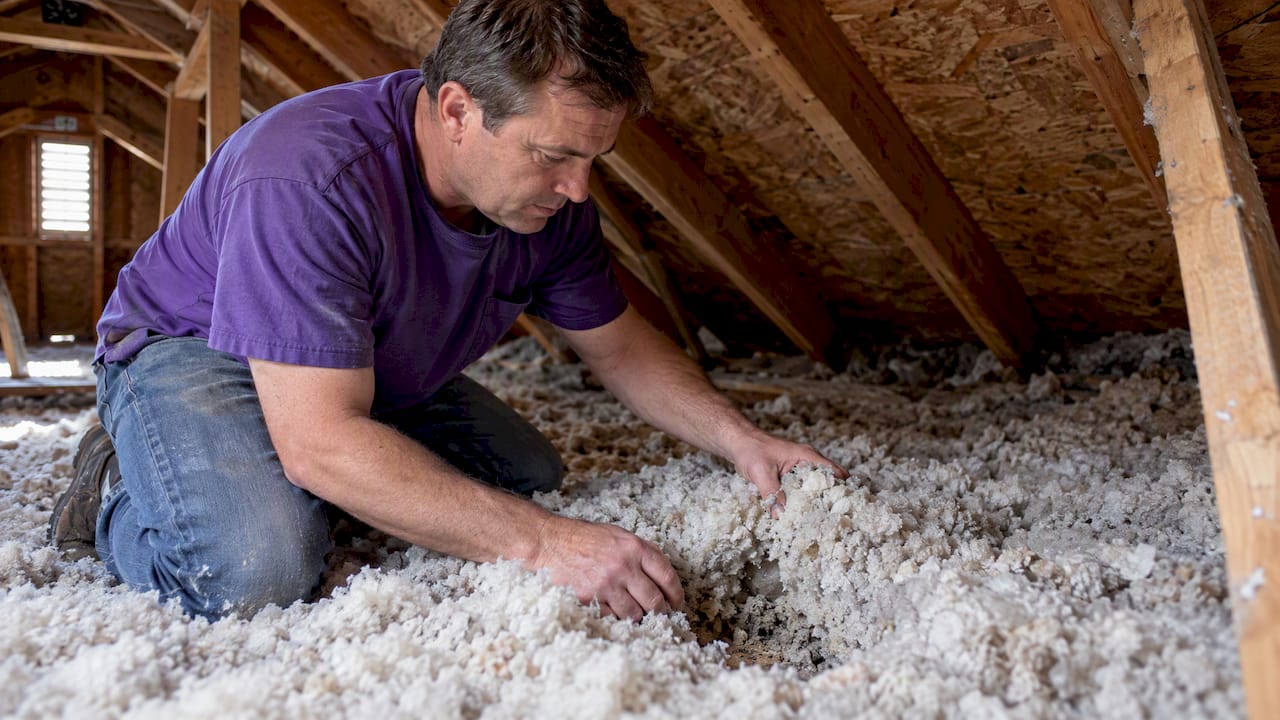
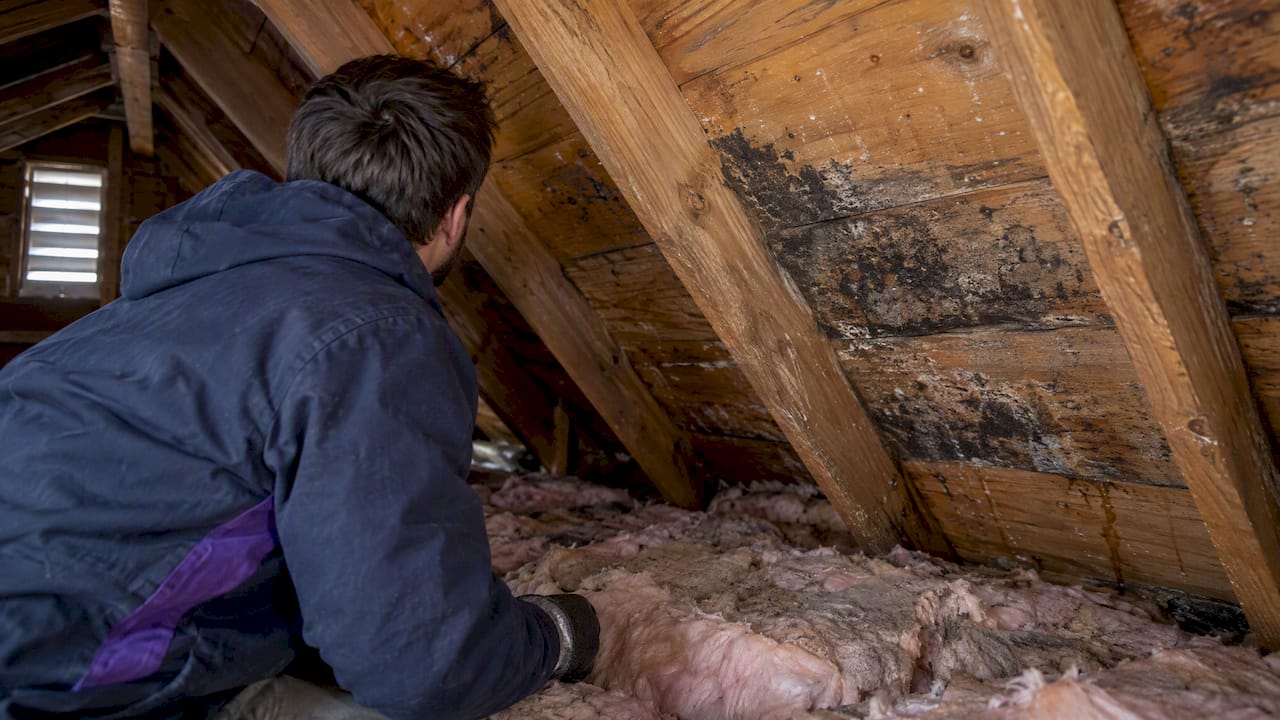
- Inspect the attic. Measure existing insulation depth in multiple spots. Look for signs your attic needs an upgrade: thin or compressed insulation, visible ceiling joists, dark streaks in insulation (a sign of air leakage), and any moisture staining. Check for vermiculite insulation (grayish, pebble-like material). Safety note: If you see vermiculite, stop and call a professional. Do not disturb it.
- Check ventilation before touching anything else. Confirm soffit vents are clear and a ridge vent or gable vents are present. Blocked ventilation must be fixed before insulation work begins.
- Test for combustion safety. If you have a gas furnace, water heater, or any natural-draft appliance in or near the attic, a combustion safety check is required before sealing. Tightening the house without addressing combustion appliances can cause backdrafting. Call a pro for this step.
- Air seal all major bypasses. Top plates, plumbing chases, recessed lights, attic hatch, duct boots, and any wiring penetrations. This step comes before insulation, every time. See the full how-to in the next section.
- Install rafter baffles at all eaves. Before blowing in insulation, baffles must be in place to maintain the ventilation channel from soffit to ridge.
- Add insulation to your R-value target. Blown-in cellulose or fiberglass for most attic floors. Aim for at least R‑49 in most continental U.S. zones.
- Seal and insulate ducts if they run through the attic. Leaky ducts in an unconditioned attic can waste a significant portion of your HVAC output.
- Final check. Confirm insulation depth with attic rulers, verify baffles are not compressed, and make sure no junction boxes are buried.
Pro Tip: Air sealing is the highest-ROI step per dollar spent. If your budget is limited, seal first and add insulation in a second phase rather than skipping sealing entirely.
How to air-seal your attic: the leaks that matter most
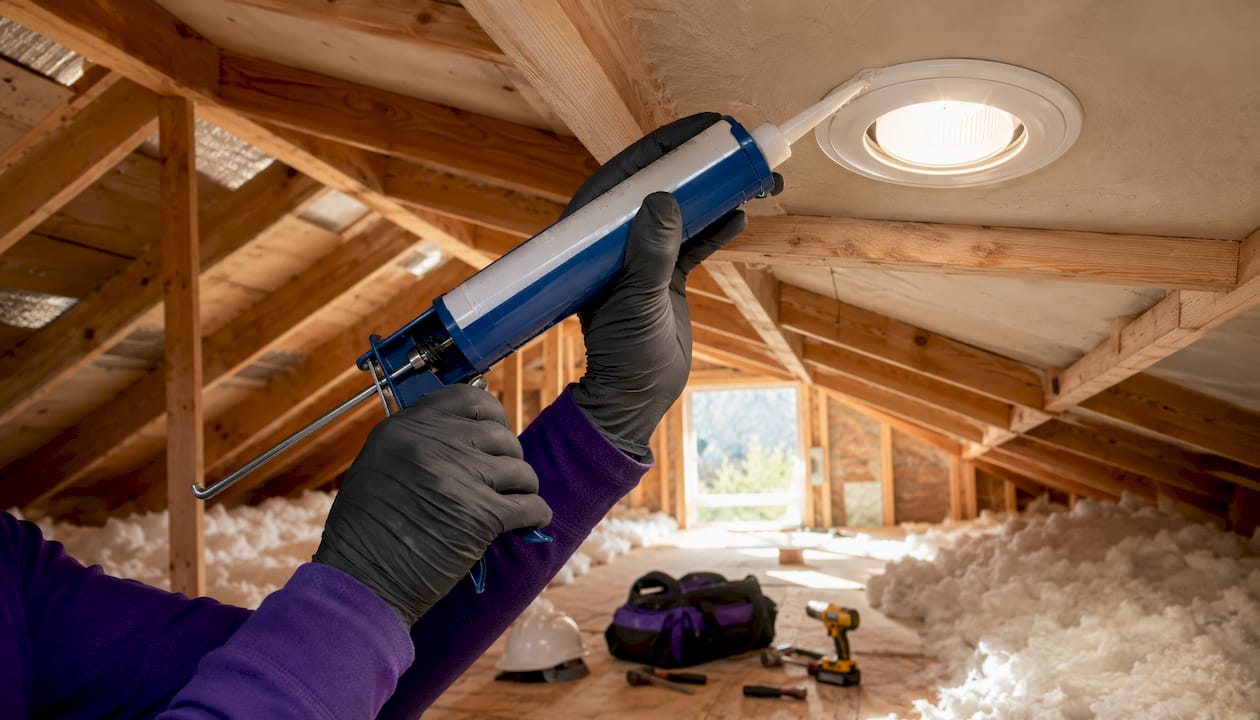
Air sealing must come before insulation because fiberglass batts and blown cellulose are air-permeable. They slow conductive heat transfer but do nothing to stop air moving through gaps. DOE research shows air sealing alone can capture 15–25% of heating and cooling savings that insulation-only work misses.
The biggest bypasses to seal
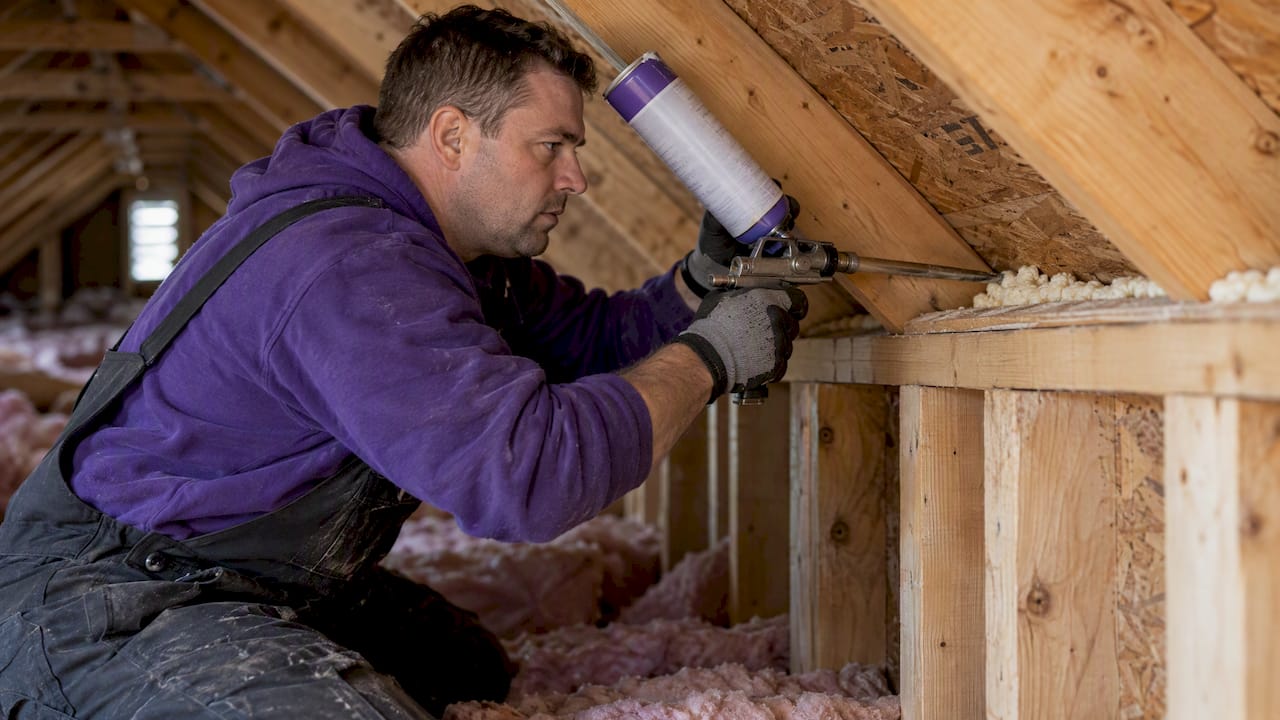
- Top plates: The gap where drywall meets the top of interior and exterior walls is one of the largest air leakage paths in most homes. Seal from the attic side with caulk or spray foam along every wall top plate.
- Attic hatch or pull-down stairs: An uninsulated, ungasketed hatch is like leaving a window open. Fix: attach R‑10 or higher rigid foam to the back of the hatch panel and add a compression gasket around the frame perimeter.
- Recessed (can) lights: Non-IC-rated fixtures cannot have insulation touching them, and they leak air badly. Fix: build a rigid foam or drywall box over each fixture, sealed at all seams with caulk or foam. Safety note: Only IC-rated (Insulation Contact) fixtures can have insulation in direct contact. Check the label inside the fixture before sealing.
- Plumbing stacks and pipes: Where pipes penetrate the ceiling, gaps are often large. Fix: use a rigid foam collar cut to fit, sealed with fire-rated caulk or foam.
- Chimney and flue chases: These require non-combustible metal flashing and high-temperature-rated caulk. Standard spray foam is not appropriate here. Maintain manufacturer-required clearance between insulation and the flue.
- Duct boots: Where HVAC ducts connect to ceiling registers, gaps around the boot are common. Seal with mastic or foil tape rated for duct use.
- Wiring and electrical penetrations: Small but numerous. Seal with caulk or low-expansion spray foam.
Step-by-step air sealing process
- Clear the attic floor of stored items and lay down planks or boards to walk on safely.
- Wear an N95 respirator, safety glasses, and long sleeves. Attic insulation fibers are a respiratory irritant.
- Turn off breakers for any circuits you will be working near.
- Identify leaks visually. Dark or discolored insulation near a gap is a reliable sign of air movement. A blower-door test or infrared camera (available through many utilities and energy auditors) makes leaks visible.
- Seal large gaps with rigid foam cut to fit, then seal the perimeter with canned spray foam or caulk.
- Seal small gaps and cracks with caulk or low-expansion foam.
- Address chimneys and flues with metal flashing and high-temp caulk before anything else in that area.
Pro Tip: If you plan to add deep blown-in insulation, air seal first while you can still see the ceiling plane. Once you blow in 12–16 inches of insulation, finding and fixing bypasses becomes nearly impossible without removing it.
For a deeper look at attic bypass sealing, the specific materials for each penetration type make a real difference in long-term performance.
What insulation type and R-value should you use?
Follow ENERGY STAR and IECC guidance: aim for at least R‑49 in most continental U.S. zones, R‑30 only in the warmest climates (Zone 1), and R‑49 to R‑60 in colder zones. For most Midwestern homes, including the greater Chicagoland area, the right target R-value range is recommended to achieve good energy efficiency. Increasing insulation from low to recommended higher R-values cuts heat loss through the attic floor roughly in half. Going from R‑49 to R‑60 adds a smaller but still meaningful improvement, and since labor dominates project cost, adding extra material in the same visit is usually worth it.
Recommended retrofit attic R-values by climate zone
| Climate Zone | States/Regions (examples) | Uninsulated Attic Target | Existing 3–4" of Insulation |
|---|---|---|---|
| Zone 1 | South Florida, Hawaii | R‑30 to R‑49 | R‑30 to R‑49 |
| Zone 2 | Gulf Coast, South Texas | R‑49 to R‑60 | R‑30 to R‑49 |
| Zone 3 | Mid-South, Central CA | R‑49 to R‑60 | R‑30 to R‑49 |
| Zone 4 (except Marine) | Mid-Atlantic, Kansas | R‑49 to R‑60 | R‑30 to R‑49 |
| Zone 4 Marine and 5 | Pacific NW, Great Lakes | R‑49 to R‑60 | R‑49 |
| Zone 6 | Northern IL, Minnesota | R‑49 to R‑60 | R‑49 |
| Zones 7–8 | Northern MN, Alaska | R‑49 to R‑60 | R‑49 |
Source: DOE Consumer Guide to Home Insulation / ENERGY STAR
Common insulation materials compared
Explore the full breakdown of attic insulation types for a material-by-material comparison, but here is the practical summary:
- Blown-in cellulose: R‑3.2 to R‑3.8 per inch. Made from recycled paper, treated for fire and pest resistance. Settles about 20% over time, so installers overshoot depth slightly. Installed cost runs roughly $0.60–$2.30 per sq ft. Best all-around value for attic floors.
- Blown-in fiberglass: R‑2.2 to R‑2.7 per inch. Does not settle as much as cellulose. Slightly lower R-value per inch means you need more depth to hit R‑49. Similar cost range to cellulose.
- Fiberglass batts: R‑3.1 to R‑4.3 per inch depending on density. Easy DIY installation between joists, but gaps and compression kill performance. Not ideal for topping up over existing insulation.
- Spray polyurethane foam (SPF): R‑3.7 to R‑6.5 per inch depending on open vs. closed cell. Expensive but doubles as an air barrier. Best suited for roof deck application in conditioned attic designs.
- Rigid foam boards: R‑3.8 to R‑6.5 per inch. Used primarily for attic hatches, knee walls, and blocking, not for full attic floor coverage.
Vented vs. conditioned attic
Most homes use a vented attic with insulation on the attic floor. A conditioned (unvented) attic uses spray foam on the underside of the roof deck, bringing the attic inside the thermal envelope. This approach makes sense when HVAC equipment or ducts run through the attic, since it eliminates duct losses in unconditioned space. The tradeoff is higher upfront cost. For most homes with ducts inside conditioned space, a vented attic with blown-in insulation on the floor is the better ROI.
How do you keep attic ventilation working after adding insulation?
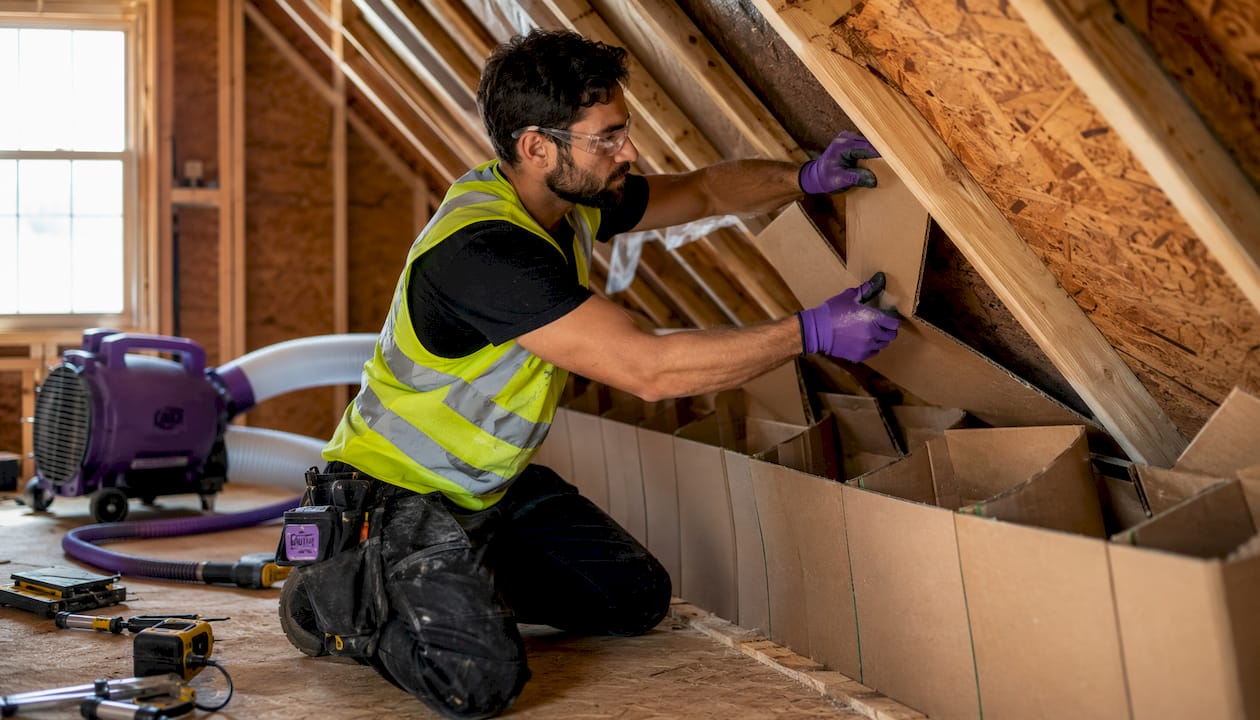
Insulation that blocks soffit vents is one of the most common and damaging installation errors. Without airflow from soffit to ridge, moisture builds up in the roof sheathing, leading to rot, mold, and voided roofing warranties. The fix is straightforward but must happen before you blow in insulation.
Steps to preserve ventilation:
- Install rafter baffles (vent chutes) in every rafter bay that adjoins a vented soffit before blowing in insulation. Baffles create a physical channel that keeps insulation from blocking the soffit opening. They must extend at least 6 inches above the final insulation depth.
- Confirm soffit vents are open and unobstructed. Check from inside the attic with a flashlight. Painted-over or debris-blocked soffits are common, especially in older homes.
- Verify ridge vent or upper exhaust vents are clear. Air needs an exit point. A ridge vent with soffit intake is the most effective combination.
- Balance intake and exhaust. Building codes generally require a net free ventilating area of at least 1/300 of the attic floor area, split roughly equally between low intake and high exhaust vents.
- Check for bird or pest blockages in soffit vents annually. Wire mesh screens help prevent this.
Pro Tip: When blowing in insulation yourself, use a depth gauge (a simple ruler zip-tied to a rafter works) every few feet to confirm you are hitting your target depth without compressing the baffles.
For more on how attic baffles support ventilation, the placement details matter more than most DIY guides acknowledge.
Common attic insulation mistakes that cost you money and safety
The most expensive attic mistakes are not about choosing the wrong insulation material. They are about sequencing and safety errors that reduce performance or create hazards.
- Insulating before air sealing. Adding R‑49 of blown cellulose over unsealed bypasses is like insulating a colander. The air leakage path remains, and you have now buried it under a foot of insulation. Fibrous insulation is not an air barrier and should never be treated as one.
- Blocking soffit vents with insulation. Causes moisture accumulation in roof sheathing. In cold climates, this leads directly to ice dams and rot.
- Burying electrical junction boxes. Junction boxes must remain accessible per electrical code. Mark their locations before insulating and use extension rings to bring them flush with the new insulation surface.
- Ignoring recessed lights. Non-IC-rated can lights in contact with insulation are a fire hazard. Box them off or replace them with IC-rated fixtures before insulating.
- Skipping the chimney clearance. Insulation must maintain manufacturer-required clearance from flues and chimneys. Combustible insulation materials too close to a flue create a fire risk.
- Disturbing vermiculite without testing. Vermiculite insulation, common in homes built before the 1990s, may contain asbestos. Do not disturb it until a licensed professional has tested and cleared it.
Building science field guidance is clear: treating fibrous insulation as an air barrier is the single most common performance failure in attic retrofits. Seal every bypass with a rigid material or rated sealant before insulation goes in. There are no shortcuts here that do not cost you later.
What does attic insulation actually cost, and when does it pay back?
Blown-in insulation combined with air sealing delivers the best return on investment of any attic upgrade, and usually of any home energy improvement. Labor and access dominate project cost, which means adding extra material to reach R‑49 or R‑60 in the same visit costs relatively little compared to doing two separate projects.
Typical cost ranges for common attic scopes
| Scope | Typical Cost Range | Notes |
|---|---|---|
| DIY air sealing (materials only) | $0.60–$2.30 per sq ft | Caulk, foam cans, rigid foam boards |
| Professional air sealing | — | Per weatherization program field data |
| Blown-in cellulose to R‑49 (pro installed) | — | Varies by attic size and access |
| Spray foam on roof deck (conditioned attic) | — | Depends on attic sq ft and foam type |
| Full insulation removal + replacement | — | Adds disposal and labor costs |
Cost ranges reflect typical U.S. market conditions. Get multiple bids for your specific home.
Professional air sealing typically costs $500–$1,500, with payback periods often measured in 1–3 years depending on home size and climate. Combined air sealing and insulation to a recommended R-value can realistically save a few hundred dollars per year on heating and cooling costs. Total project costs and payback vary widely based on many factors.
Stopping at a low R-value to save money upfront is usually a false economy. Since labor and access are the expensive parts, the incremental cost of going from R‑30 to R‑49 in the same visit is small relative to the long-term energy savings you leave on the table.
If you are planning to sell, attic insulation before listing also tends to improve appraisal outcomes and buyer confidence.
How to prepare your attic safely before any work begins
Starting attic work without a proper inspection is how small problems become expensive ones. Before you or a contractor touches anything, run through this preparation sequence.
- Look for vermiculite. Grayish, pebble-like material between joists. If present, stop. Contact a licensed asbestos professional for testing before proceeding.
- Assess structural access. Check that the attic floor joists can support your weight. Never step between joists onto drywall. Lay down planks or OSB sheets to walk on.
- Locate combustion appliances and ductwork. Note the position of any gas appliances, flues, or HVAC equipment. These affect both safety sequencing and the scope of work.
- Document existing insulation. Measure depth in at least five spots across the attic floor. Photograph the current condition, including any moisture staining, pest evidence, or damaged insulation.
- Turn off relevant breakers. Before working near any wiring, shut off the circuits that run through the attic.
- Gear up. N95 or P100 respirator, safety glasses, long sleeves, gloves. Attic insulation fibers and dust are respiratory hazards.
Before you start, clear stored items from the attic floor. You need clear access to the ceiling plane for air sealing, and stored boxes compress insulation and block ventilation. For a full attic preparation checklist, the sequencing details matter.
Questions to ask any contractor before signing a bid:
- Does the scope include air sealing, or just insulation?
- Will you perform or recommend a blower-door test before and after?
- How will old insulation be disposed of, and is that cost included?
- What warranty do you provide on materials and labor?
- Are you licensed and insured in Illinois (or your state)?
When should you hire a professional instead of doing it yourself?
The Attic Genius team brings 25+ years of combined experience in attic insulation, air sealing, and related services, with 400+ five-star reviews across Chicagoland and the Northwest Suburbs.
Some attic work is genuinely DIY-friendly. Sealing the attic hatch, caulking small penetrations, and adding batt insulation between joists are tasks most homeowners can handle safely with the right prep. But several scenarios call for a licensed professional.
Hire a pro when: you find vermiculite or suspect asbestos; there are combustion appliances with natural-draft venting; HVAC ducts run through the attic and need sealing or repositioning; the existing insulation needs full removal; or structural access is limited and working safely requires scaffolding or specialized equipment.
The Attic Genius handles:
- Attic air sealing (all major bypasses, including can lights, top plates, and chases)
- Blown-in and batt insulation installation and full replacement
- Attic ventilation assessment and upgrades
- Mold remediation and moisture control
- Pest waste cleanup and post-infestation insulation replacement
- Garage insulation
A blower-door test before and after the project is the only way to verify that air sealing actually worked. Ask any contractor you hire whether they offer or recommend one. Winterizing the rest of your home’s envelope, including door and window sealing, compounds the savings from attic work.
How to find rebates and tax credits for attic insulation
Rebates and tax credits can cut your net project cost by 30% or more, but you need to document correctly before and during the project.
The federal Section 25C tax credit (Inflation Reduction Act) covers up to 30% of the cost of qualifying insulation and air sealing improvements, subject to annual caps and product certification requirements. ENERGY STAR’s insulation fact sheet outlines what qualifies and how to document it.
How to claim rebates and credits:
- Find utility rebates first. Use the ENERGY STAR Rebate Finder at energystar.gov to search by ZIP code. Many Illinois utilities offer rebates for blown-in insulation and air sealing.
- Confirm product certification. For the federal tax credit, insulation must meet ENERGY STAR certification requirements. Ask your contractor for the manufacturer certification statement before work begins.
- Save all receipts and invoices. The IRS requires documentation of the product type, cost, and certification. Keep contractor invoices that itemize insulation and air sealing separately from other work.
- File IRS Form 5695 with your federal return for the Section 25C residential energy credit. The credit applies to the tax year in which the improvement is placed in service.
- Check for state-level credits. Illinois and Wisconsin both have energy efficiency programs. Check with your state energy office or utility for current availability.
- Coordinate timing with your contractor. Some utility rebates require pre-approval or a post-installation inspection. Confirm the rebate process before scheduling work.
This article is general information, not tax or legal advice. Confirm current credit rules and eligibility with a tax professional or the IRS for your specific situation.
Key Takeaways
Air sealing before insulation is the single most important sequencing decision in any attic energy upgrade, and skipping it consistently undercuts the performance of even high-R insulation.
| Point | Details |
|---|---|
| Air seal before insulating | Seal top plates, can lights, hatches, and chases before adding any insulation material. |
| Target R‑49 or higher | Most continental U.S. zones (including Chicagoland) need R‑49 to R‑60 for cost-effective attic performance. |
| Preserve ventilation | Install rafter baffles at every eave before blowing in insulation to maintain soffit-to-ridge airflow. |
| Claim available credits | The federal Section 25C credit covers up to 30% of qualifying insulation costs; utility rebates stack on top. |
| The Attic Genius | Serves Chicagoland and Northwest Suburbs with air sealing, insulation, ventilation, and mold remediation, with upfront pricing and written warranties. |
The case for sealing first: a perspective on what actually works
Most homeowners who call about high energy bills have already added insulation. Sometimes twice. The problem is almost never the insulation itself. It is what is underneath it.
When you walk an attic and pull back insulation near a top plate, you often find a gap you could fit your hand through. That gap has been pumping conditioned air into the attic for years, and the insulation sitting on top of it did essentially nothing to stop it. Sealing that one bypass can have more impact than doubling the insulation depth, because you are stopping the air movement that was bypassing the insulation entirely.
The pattern repeats in home after home: insulation added without sealing, and the homeowner left wondering why their bills did not drop. The fix is not more insulation. It is going back to the ceiling plane, finding the bypasses, and closing them. Only then does the insulation you already have perform anywhere near its rated R-value.
For homeowners deciding between DIY and hiring out the air sealing, the honest answer is this: sealing is worth doing professionally at least once, because a trained eye finds bypasses a homeowner will miss, and a blower-door test confirms the work actually closed the leaks.
The Attic Genius can handle the whole project for you
Most attic projects fail not because of the wrong material but because of the wrong sequence. The Attic Genius handles the full scope: air sealing every major bypass, blown-in insulation to your climate zone’s R-value target, ventilation assessment, and mold remediation if needed. Every project comes with upfront pricing, a written warranty, and same-day inspections available across Chicagoland and the Northwest Suburbs.

The process is straightforward: free estimate, on-site inspection, written fixed-price proposal, and scheduled installation. No surprises on the invoice. If your attic has combustion appliances, suspected vermiculite, or ductwork that needs attention, the team handles those scenarios too. Ready to stop guessing what your attic is costing you? Schedule your inspection and get a written quote from The Attic Genius.
Useful sources and further reading
- ENERGY STAR: Rule Your Attic — The EPA’s primary homeowner resource for attic sealing and insulation, including the 15% savings estimate and step-by-step project guidance.
- ENERGY STAR: Recommended R-Values — Climate zone R-value targets for attic retrofits, organized by U.S. zone.
- ENERGY STAR: Attic Air Sealing Project — Detailed guidance on sealing bypasses before insulating, with material recommendations.
- DOE Consumer Guide to Home Insulation — R-value tables by climate zone and insulation material overview from the Department of Energy.
- DOE Measure Guideline: Attic Air Sealing — Technical field guide covering combustion safety, ventilation, and air sealing sequencing for contractors and informed homeowners.
- EPA: Vermiculite Insulation and Asbestos — Official EPA guidance on identifying and safely handling vermiculite insulation.
- ENERGY STAR Insulation Fact Sheet — Covers federal tax credit eligibility, product certification requirements, and the ENERGY STAR rebate finder.
- Building America Solution Center (BASC) — DOE-backed field guidance on attic air sealing checklists, common mistakes, and installation standards.
- The Attic Genius: Air Sealing Services — Service page for Chicagoland homeowners ready to schedule professional air sealing.
- The Attic Genius: Attic Preparation Guide — Step-by-step prep checklist before any insulation or sealing work begins.
- The Attic Genius: Attic Insulation Mistakes to Avoid — Common sequencing and safety errors DIY homeowners make, with fixes.