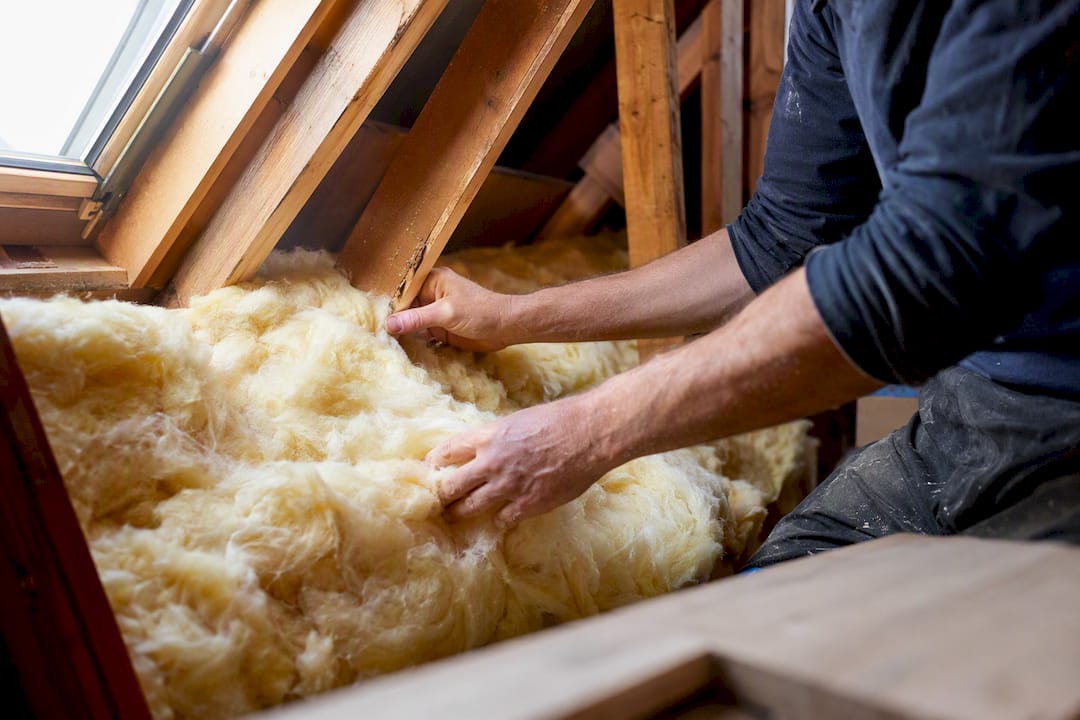
Compressing fiberglass batts reduces their total R-value because the loss in overall thickness outweighs any gain in R-value per inch from increased density. Fiberglass insulation primarily works by trapping air in pockets between its fibers, and squeezing the batt diminishes these critical air pockets, allowing heat to transfer more easily. This effect is widely recognized in the industry; for instance, NAIMA (North American Insulation Manufacturers Association) publishes specific compressed R-value charts to account for this common issue in real houses.
Yes, compressing fiberglass batts matters, and in most cases it lowers the total insulating power of your wall or ceiling cavity. Squeezing a batt into a tighter space raises its R-value per inch, but shrinking the thickness costs you more than that gain buys back. The net result is almost always less total R than the label promises.
This isn’t a fringe opinion. It’s the consensus among the groups that actually write the rules for insulation performance:
- NAIMA (North American Insulation Manufacturers Association) publishes compressed R-value charts specifically because this happens so often in real houses.
- RESNET, which certifies home energy raters, requires an adjusted R-value calculation whenever a batt is compressed.
- ASTM C518 is the lab test manufacturers use to establish the R-value printed on the bag in the first place, measured at full, uncompressed thickness.
Here’s the pattern in a nutshell: squeeze a 6.25 inch, R-19 batt into a 5.5 inch wall cavity, and the R-value per inch climbs. But you’ve also lost roughly 12% of the batt’s thickness, and the manufacturer-published compression data shows that trade rarely breaks even.
Key Takeaways
Compressing a fiberglass batt raises its R-value per inch but nearly always lowers the cavity’s total R-value because installed thickness drops faster than density gains compensate for.
| Point | Details |
|---|---|
| Compression trade-off | R per inch rises with compression, but total cavity R usually falls because thickness matters more. |
| Estimate your loss | Use the rule of thumb: percent compression divided by two, multiplied by the label R-value. |
| Check manufacturer charts first | NAIMA’s aggregated data is a starting point, but product-specific charts override generic estimates. |
| Gaps beat compression as the real enemy | Fishmouths, voids, and misaligned flanges typically cost more heat loss than modest compression. |
| Get a professional read | The Attic Genius offers same-day inspections that measure installed thickness and document adjusted R-values before recommending a fix. |
Primary Sources and Further Reading
For the technical calculation behind compressed R-values, start with NAIMA’s compression charts and the HERS rater guidance. For practical, field-level explanations, Bruce Harley’s Q&A on compressing fiberglass batts and the Energy Vanguard analysis walk through real-world examples. For the underlying lab data, the OSTI technical report on compression has the measured numbers behind the estimates.
Table of Contents
- Why Do Fiberglass Batts Compress? The Physics Behind It
- How to Calculate Compressed R-Value in Your Own Walls
- What NAIMA, RESNET, and ASTM Say About Compression
- Installation Mistakes That Hurt More Than Compression
- Beyond R-Value: Moisture, Sound, and Settling Risks
- When to Call a Professional for an Insulation Inspection
- Fix Compression Issues With a Same-Day Inspection
- Frequently Asked Questions
- Sources
Why Do Fiberglass Batts Compress? The Physics Behind It
A fiberglass batt insulates mainly by trapping air in pockets between tiny glass fibers. These air pockets provide most of the insulation’s effectiveness by resisting heat flow. Fiberglass fibers are actually decent heat conductors compared to air, so the insulation depends on keeping air still and dispersed in tiny pockets rather than letting it move freely or touch fiber-to-fiber too much.
Squeeze the batt and you shrink those air pockets. Fibers pack closer together, which does raise resistance per inch, since heat now has to snake through a denser thicket of material with more scattered air gaps. That’s the part of the story most compression charts show as a positive number. But you’ve also just made the batt thinner, and R-value is a function of both material density and total thickness. Lose enough thickness and the modest R/inch gain gets swamped by the loss of overall material between your living space and the outdoors.
The mechanical chain looks like this.
- Thickness decreases as fibers get squeezed together in a tighter cavity.
- Fibers make more direct contact with each other, creating small conductive bridges heat can travel along.
- Trapped air pockets shrink and connect, weakening the insulating layer that used to separate them.
- The batt presses harder against framing members, and wood conducts heat far faster than fiberglass, so more heat finds a path straight through the studs.
Picture a wall cross section: drywall, then the batt, then sheathing. In a properly installed cavity, the batt fills that space fully, corner to corner, front to back, with no visible gaps at the edges. In a compressed cavity, you’ll often see the batt bulging slightly at the drywall side while pulling away from the sheathing, or flattened uniformly thinner than it should be, sometimes with the paper facing wrinkled or torn where it got jammed into too little space.
Laboratory testing backs this up with real numbers. Technical reports measuring compressed batts found R/Ro ratios (the compressed R-value divided by the original) landing around 0.55 to 0.65 at 50% compression in some tested products, meaning you can lose closer to half the batt’s effectiveness at that extreme. Products vary, and manufacturer-specific charts are more reliable than any single lab test, but the direction of the effect is consistent across the board.
Pro Tip: If you’re staring at a 2×4 wall with standard R-15 batts rated for 3.5 inches, don’t assume you’re getting the full R-15. Check the actual cavity depth first. A quarter inch of drywall bow or an oversized electrical box can quietly compress the batt more than you’d expect.
The net effect in one sentence: compression trades a small R-per-inch gain for a larger total-R loss, because thickness matters more to overall thermal resistance than density does.
How to Calculate Compressed R-Value in Your Own Walls
You don’t need a lab to get a reasonable estimate. The rule of thumb used in NAIMA’s HERS rater guidance is straightforward: R loss is roughly half the percent compression, multiplied by the batt’s labeled R-value.
Worked example:
- Start with an R-19 batt rated at 6.25 inches thick.
- Your actual cavity depth is 5.5 inches (a standard 2×6 wall).
- Calculate the percent compression: (6.25 minus 5.5) divided by 6.25, which equals 12%.
- Apply the rule of thumb: 12% compression divided by 2 equals roughly a 6% R loss.
- Apply that to the label value: R-19 reduced by about 6% yields an estimated compressed R-value close to R-18.
That’s a modest loss for a modest compression.
Before you run this math on your own house, gather three numbers:
| What to measure | How to find it |
|---|---|
| Label thickness | Printed on the batt’s plastic wrap or paper facing |
| Actual cavity depth | Measure stud or joist depth directly, or probe through an outlet cover with a ruler |
| Installed batt thickness | Check at an attic access point, or gently pull back insulation at a low-visibility spot |
This rule of thumb gets you in the right neighborhood, but it’s an approximation. Manufacturer compression charts list actual tested values for specific products at specific compression ratios, and those numbers take precedence whenever you can find them, since fiber density and binder composition vary by brand.
What NAIMA, RESNET, and ASTM Say About Compression
The organizations that set standards for this industry don’t treat compression as an automatic failure. They treat it as a condition that has to be measured and accounted for.
NAIMA maintains published compression charts that estimate R-value loss at various compression percentages for standard batt products. The group’s consistent caveat: these are aggregated estimates, and manufacturer-specific data for the exact product installed should always be the first reference point.
RESNET, which oversees home energy ratings, allows a rater to calculate and document a compressed R-value and still award a Grade 1 installation, so long as the adjusted number reflects reality. The official HERS rater guidance explicitly warns against a “double penalty,” where a home gets dinged both for the lower adjusted R and for a poor grade on top of it. Document the real number, and the installation isn’t automatically marked defective just because a cavity ran narrow.
ASTM C518 is the laboratory test method manufacturers use to establish the R-value printed on every roll and batt of fiberglass insulation. That number reflects performance at full, labeled thickness under controlled lab conditions, which is why installed thickness matters so much. The label is only accurate when the product is installed the way it was tested.
| Organization | Practical takeaway for homeowners |
|---|---|
| NAIMA | Check manufacturer compression charts before assuming standard loss rates |
| RESNET | A compressed batt can still pass inspection if the adjusted R is documented correctly |
| ASTM C518 | The label R-value only applies at full, uncompressed thickness |
Installation Mistakes That Hurt More Than Compression
Modest compression, the kind you get squeezing an R-19 into a 2×6 wall, is a manageable loss. Sloppy installation is not, and it’s far more common than most homeowners realize.
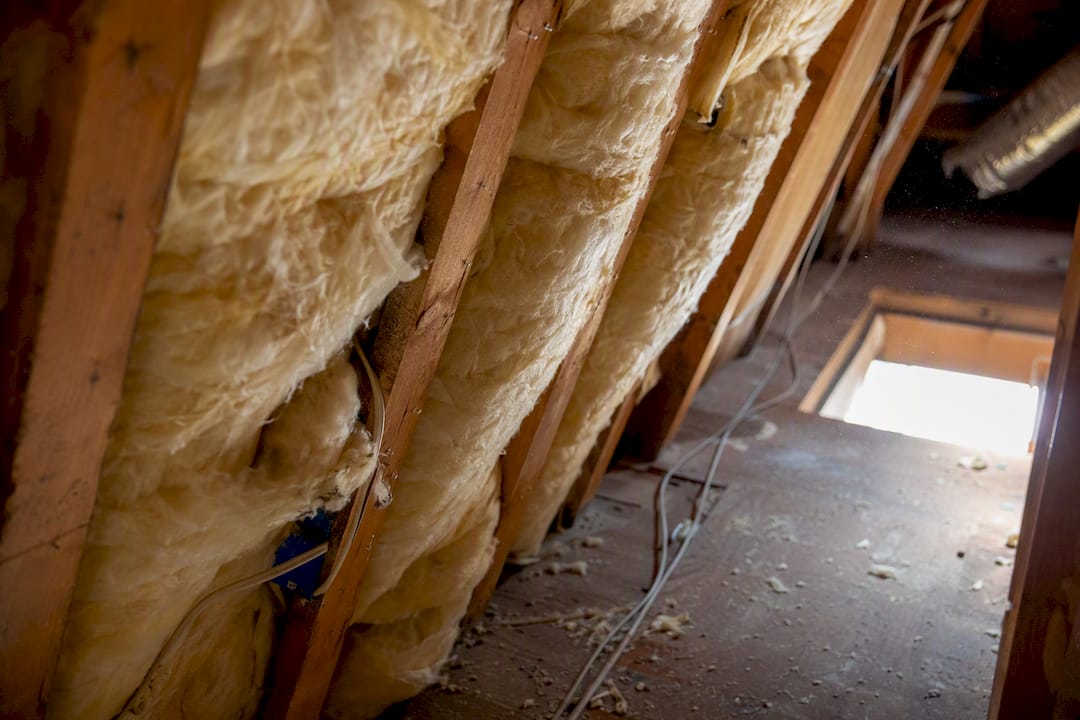
- Gaps and voids. A batt cut a half inch short at the top or bottom of a stud bay leaves a direct thermal hole, and that gap does more damage than 20% compression ever would.
- Fishmouths. These are the gaps that form when the batt’s paper facing folds over on itself instead of lying flat against the framing, usually visible as a puckered flap at the stud edge.
- Flange misalignment. Kraft paper or foil facing that’s stapled outside the framing rather than inset creates a compression ridge and a gap behind it in the same spot.
- Batts stuffed around wiring and junction boxes. Cramming insulation around an obstruction without cutting it to fit compresses one section while leaving voids in another.
- Sagging and settling. Batts installed without adequate support, especially in older construction without modern retention clips, can slump over years, leaving an uninsulated gap at the top of the cavity.
You can catch most of these from an attic access hatch or a small inspection hole cut in a closet wall. Look for wrinkled facing, visible daylight through gaps, or batts that look flattened unevenly rather than uniformly compressed.
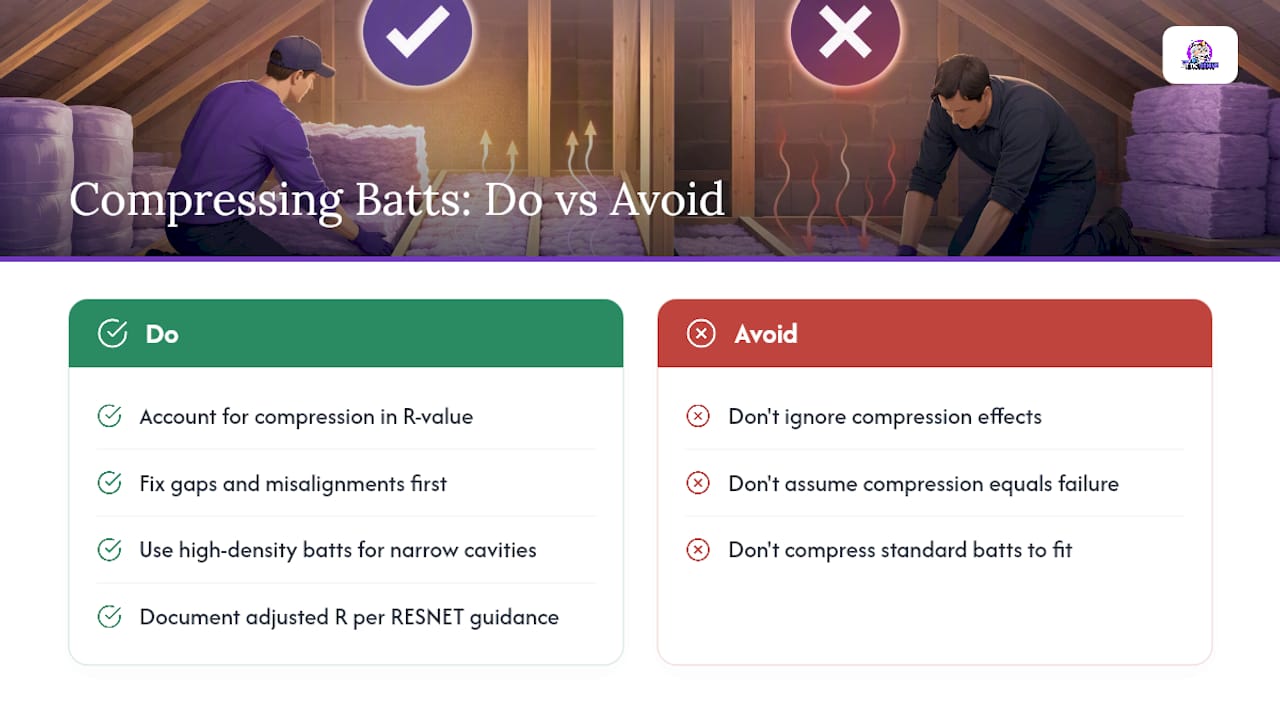
The fix for most of these issues is straightforward. Industry installation guidance recommends cutting batts to fit cavities precisely, front-to-back and side-to-side, and saving trimmed scraps to stuff behind electrical boxes and around pipes rather than compressing the whole batt to work around the obstruction. For narrow or irregular cavities, a high-density batt rated for that exact thickness outperforms a standard batt forced into too small a space. If you’re planning a broader upgrade, preparing your attic properly before adding insulation prevents most of these problems before they start, and a rundown of the most frequent attic insulation mistakes DIYers make is worth a look before you pick up a utility knife.
Pro Tip: When trimming a batt to fit around a brace or blocking, cut it slightly oversized rather than slightly undersized. A batt that’s a little too big compresses evenly; one that’s too small leaves a gap you’ll never notice until your energy bill does.
Beyond R-Value: Moisture, Sound, and Settling Risks
Compression’s biggest cost usually isn’t the R-value number. It’s what happens around the edges of the insulation once airflow and moisture patterns change.
- Condensation risk. A batt compressed tight against exterior sheathing can trap moisture-laden air against a cold surface, raising the odds of condensation forming inside the wall cavity over a cold season.
- Sound performance. Compressed fiberglass loses some of its acoustic dampening ability, since sound absorption depends on the same trapped air pockets that thermal performance does.
- Settling behavior. A batt already under mechanical stress from compression is more prone to shifting or sagging over time than one installed at its designed thickness.
Air sealing matters more here than the compression itself. Warm, moist indoor air finding its way through gaps and reaching a cold surface causes far more condensation damage than a slightly thinner batt does on its own. If you’re troubleshooting moisture in a wall or attic cavity, closing off air bypass points is usually the higher-leverage fix compared to chasing every inch of batt thickness.
When to Call a Professional for an Insulation Inspection
Some situations call for a tape measure and a Saturday afternoon. Others call for someone with a blower door and a moisture meter.
Call a pro when you see:
- Compression across multiple cavities, not just one or two spots.
- Any sign of moisture staining, musty odor, or visible mold on insulation or framing.
- Noticeably drafty rooms or uneven temperatures that suggest air leaks alongside compression.
- Large sections of attic or wall insulation that look flattened, displaced, or contaminated.
A thorough professional inspection should include:
- An evaluation of attic access and existing insulation depth at multiple points, not just one spot check.
- Direct measurement of installed batt thickness compared to labeled thickness.
- Air sealing assessment, since bypass points often matter more than the insulation itself.
- Documentation of adjusted R-value assumptions if compression is present, matching the same logic RESNET raters use.
Before hiring anyone, ask for a written estimate, a clear recommended remedy (reinstall, replace with high-density batts, or top with blown-in fiberglass), a realistic timeline, and whether they document adjusted R-values the way a HERS rater would. A contractor who can’t answer that last question probably isn’t looking closely enough.
An Installer’s Take on Compression
Most of the compressed batts I run into aren’t a design problem. They’re a rush job. Someone crammed insulation around a junction box instead of cutting a scrap to fit, or a flange got stapled crooked and nobody noticed the gap behind it. The single biggest win for most homeowners isn’t chasing perfect R-per-inch math. It’s fixing the gaps and air leaks first, since those cost far more heat than a slightly compressed batt ever will. After 25-plus years of combined field experience on The Attic Genius team, that’s the pattern that shows up again and again.
Fix Compression Issues With a Same-Day Inspection
Reading about compressed R-values is one thing. Knowing exactly how much yours has cost you is another, and that’s where a hands-on look beats a formula every time. The Attic Genius offers same-day inspections across Chicagoland and the Northwest Suburbs, measuring your actual installed insulation depth against what it should be and giving you a written report before you spend a dollar on materials.

If your attic floor or walls show the kind of flattened, uneven batts we’ve covered here, a diagnostic inspection tells you whether you need a full insulation upgrade or just targeted repairs in a few problem areas. We handle everything from air sealing to reinstalling compressed batts to topping existing insulation with blown-in fiberglass, all backed by upfront pricing and written warranties. If you’re also weighing other efficiency upgrades, pairing insulation work with improvements like energy-efficient interior doors rounds out the whole envelope. Request your inspection today and get a clear answer on what your attic actually needs.
Frequently Asked Questions
Does compressing fiberglass batts always reduce R-value?
In nearly every case, yes. R-value per inch goes up, but total cavity R goes down because you’ve lost thickness, and thickness is the bigger factor in the equation.
How much R-value do I lose from moderate compression?
A rough industry rule of thumb estimates R loss at about half the percent compression, multiplied by the label R.
Is a compressed batt considered a failed insulation job?
Not automatically. RESNET guidance allows raters to document an adjusted R-value and still award a Grade 1 installation, as long as the compression is accounted for rather than ignored.
What matters more: compression or installation gaps?
Gaps, fishmouths, and misaligned flanges typically cause bigger real-world heat loss than modest compression does. Fixing installation defects usually delivers a bigger performance improvement than chasing perfect thickness.
Should I use a denser batt in a narrow cavity instead of compressing a standard one?
Yes, when the cavity is consistently narrower than standard batt sizing, a high-density batt rated for that exact thickness performs better than compressing a standard-density product to fit.
Sources
- Estimated R-values for Compressed
- Q&A: Compressing Fiberglass Batts
- Reduction in the thermal resistance (R-value) of loose-fill insulation and fiberglass batts due to compression
- Is Compressed Fiberglass Insulation Really So Bad?