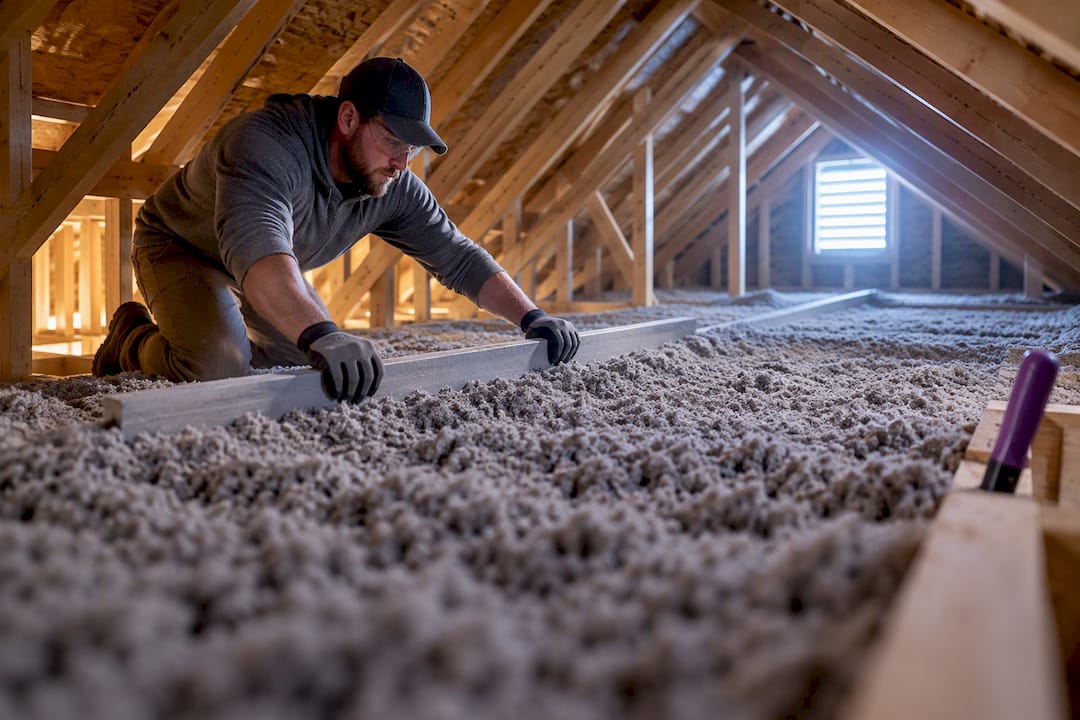
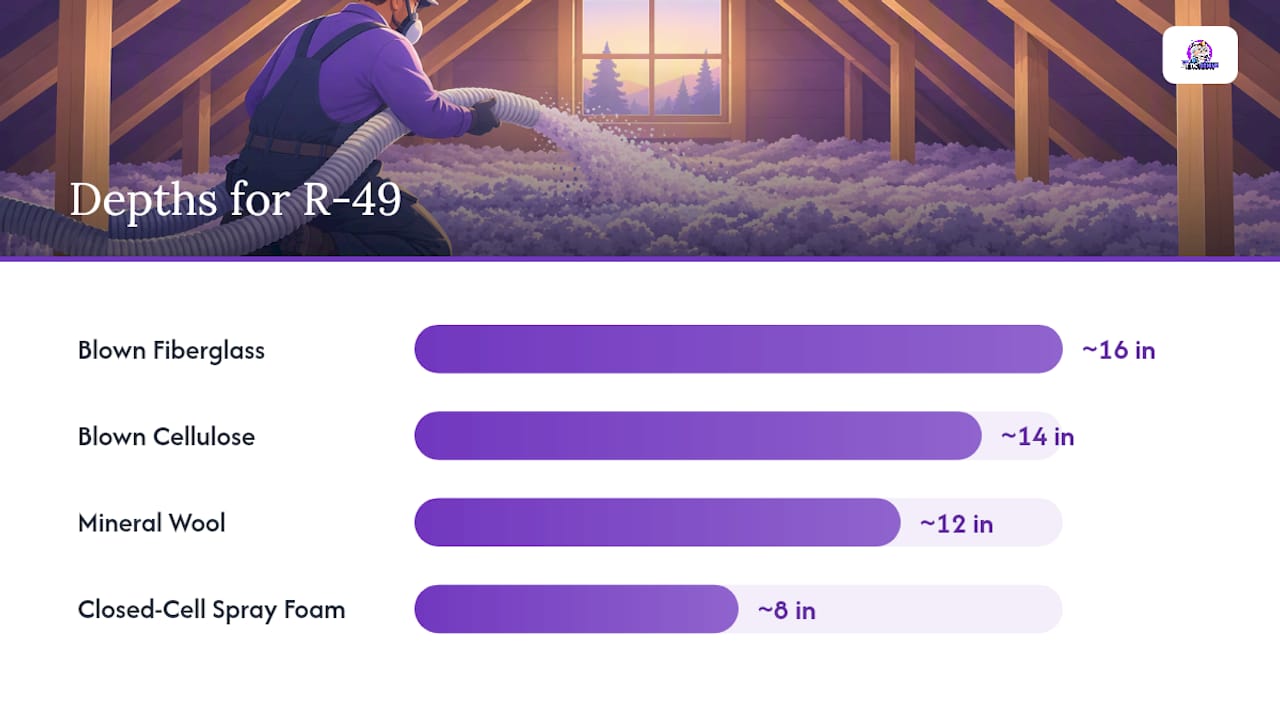
Most homes need attic insulation rated at a level generally recommended around R-49, which corresponds to roughly 14 inches of blown cellulose or 16 inches of blown fiberglass. Homes in warm climates can aim for about R-30, while cold northern climates should target higher levels up to R-60. Closed-cell spray foam achieves similar insulation in about half the depth. None of that matters, though, if the attic floor still leaks air around the top plates and can openings.
TL;DR:
- Most homes should aim for at least R-49 insulation, which typically requires 14 inches of blown cellulose or 16 inches of blown fiberglass, depending on climate.
- Achieving the recommended R-value depends on material type, with cellulose providing about R-3.2 to R-3.8 per inch and fiberglass around R-2.2 to R-2.7, influencing installed depth.
- Proper attic insulation requires sealing air leaks and ensuring ventilation before installation, as depth alone does not guarantee insulation effectiveness.
- Cost estimates vary based on material, attic accessibility, and whether existing insulation needs removal, with air sealing adding significant energy savings.
- A professional inspection can identify existing insulation issues, moisture or pest problems, and provide an accurate R-value target tailored to local climate and attic conditions.
Table of Contents
- What R-Value Should Your Attic Insulation Thickness Target?
- Material R-Per-Inch and Depth Chart: Inches Needed for R-30 to R-60
- How to Check Your Existing Attic Insulation Yourself
- Get the Installation Order Right: Seal, Vent, Then Insulate
- What Does It Cost, and How Fast Does It Pay Back?
- Why Depth Alone Doesn’t Tell the Whole Story
- Get a Written Depth and R-Value Plan From The Attic Genius
- Primary Sources and References
- Sources
- FAQ
What R-Value Should Your Attic Insulation Thickness Target?
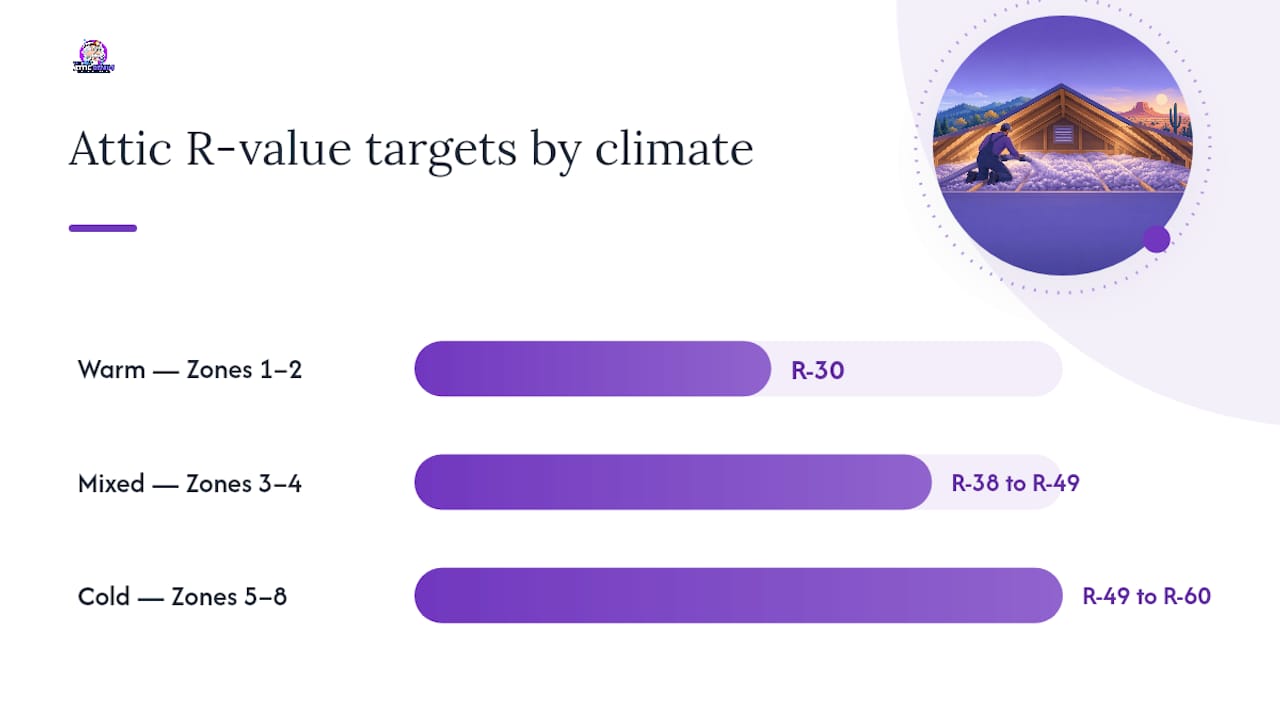
Your target depends on where you live, not on what your neighbor did. The 2021 IECC and ENERGY STAR guidance sets attic retrofit targets on a sliding scale by climate zone, running from R-30 in the hottest parts of the South up to R-60 across the northern tier and much of the Midwest.
Most retrofit guides simplify this into one practical rule: aim for at least R-49 unless you live somewhere that barely sees freezing temperatures. That single number covers a huge swath of the country, including most of the Midwest, Mid-Atlantic, and Northeast, where The Attic Genius does most of its work.
There’s a wrinkle worth knowing about. Some energy codes let you satisfy an R-60 requirement by installing R-49 over a larger attic floor area, an exception built into the code for cases where full R-60 depth isn’t practical given roof framing or clearance. It’s a code detail, not a shortcut, so don’t assume it applies to your project without checking with whoever pulls your permit.
Rough targets by situation:
- Warm climates (Zones 1 to 2): R-30
- Mixed and moderate climates (Zones 3 to 4): R-38 to R-49
- Cold and very cold climates (Zones 5 to 8): R-49 to R-60
Material R-Per-Inch and Depth Chart: Inches Needed for R-30 to R-60
Once you know your target R-value, converting it to inches depends entirely on which material you’re using. Materials vary widely in how much insulating power they pack per inch, and that difference changes your depth math significantly.
Blown cellulose delivers roughly R-3.2 to R-3.8 per inch. Blown fiberglass runs lower, around R-2.2 to R-2.7 per inch, which is why fiberglass jobs always look deeper than cellulose jobs for the same R-value. Fiberglass batts land in between at R-3.0 to R-3.7 per inch, mineral wool holds steady around R-4 per inch, and closed-cell spray foam leads the pack at roughly R-6 per inch.
| Target R-Value | Blown Cellulose | Blown Fiberglass | Mineral Wool | Closed-Cell Spray Foam |
|---|---|---|---|---|
| R-30 | ~8 in | ~12 in | ~7.5 in | ~5 in |
| R-38 | ~10.5 in | ~15 in | ~9.5 in | ~6.5 in |
| R-49 | ~14 in | ~16 in | ~12 in | ~8 in |
| R-60 | ~17 in | ~24 in | ~15 in | ~10 in |
These midpoints come from standard depth conversion tables used across the insulation industry. One catch with cellulose: it settles over time, so the depth installed on day one needs to run higher than the settled depth you’re actually targeting. Fiberglass batts and blown fiberglass settle far less, so installed depth and long-term depth stay close to identical.
Pro Tip: If your attic has less than 10 inches of clearance at the eaves, batts and loose fill may compress before they ever reach full loft. Closed-cell spray foam or rigid foam board gets you the same R-value in a fraction of the depth.
How to Check Your Existing Attic Insulation Yourself
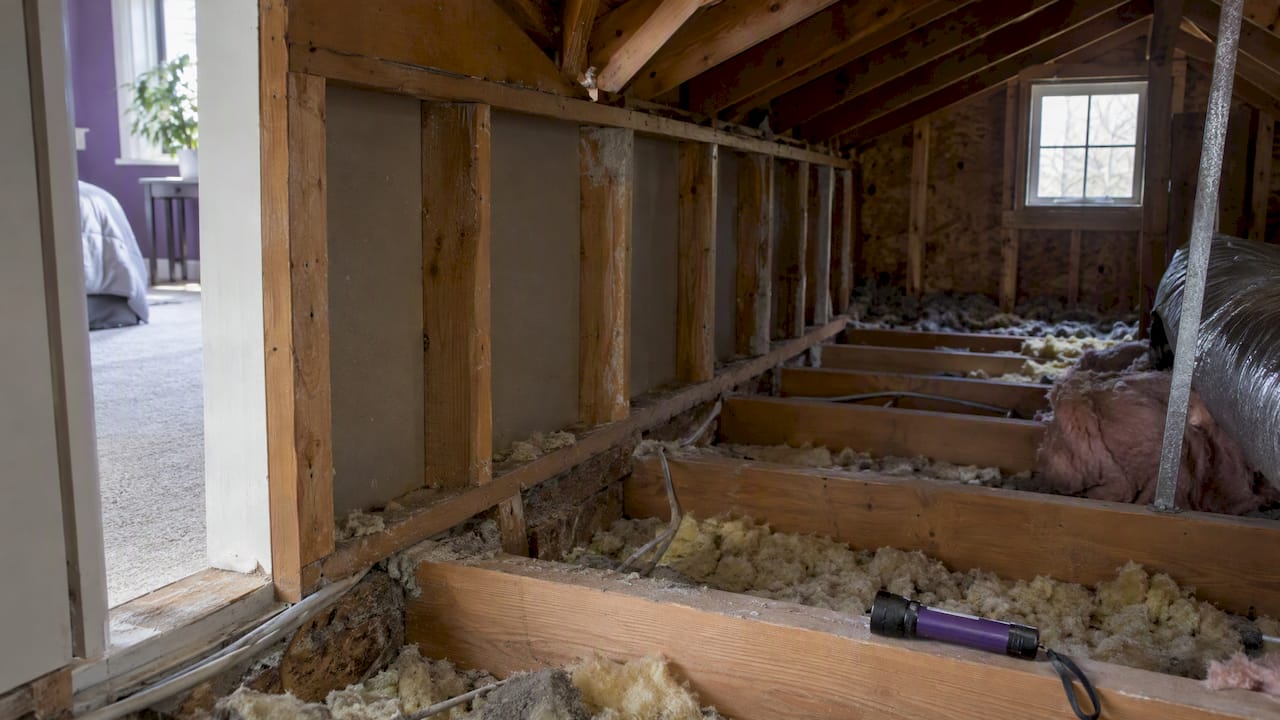
Before you buy anything, find out what you actually have. It takes about 20 minutes with a flashlight, a tape measure, and a dust mask.
- Access the attic safely, using a stable ladder and stepping only on joists, never on the drywall between them.
- Measure depth in three or four spots with a tape measure or a ruler pushed straight down to the joist.
- Identify the material (loose gray or beige cellulose, pink or yellow fiberglass, or rigid foam boards) and match your depth reading to the chart above for a rough R-value.
- Look for warning signs: visible joists poking through thin insulation, bare patches, water stains, or matted, compressed sections near the eaves.
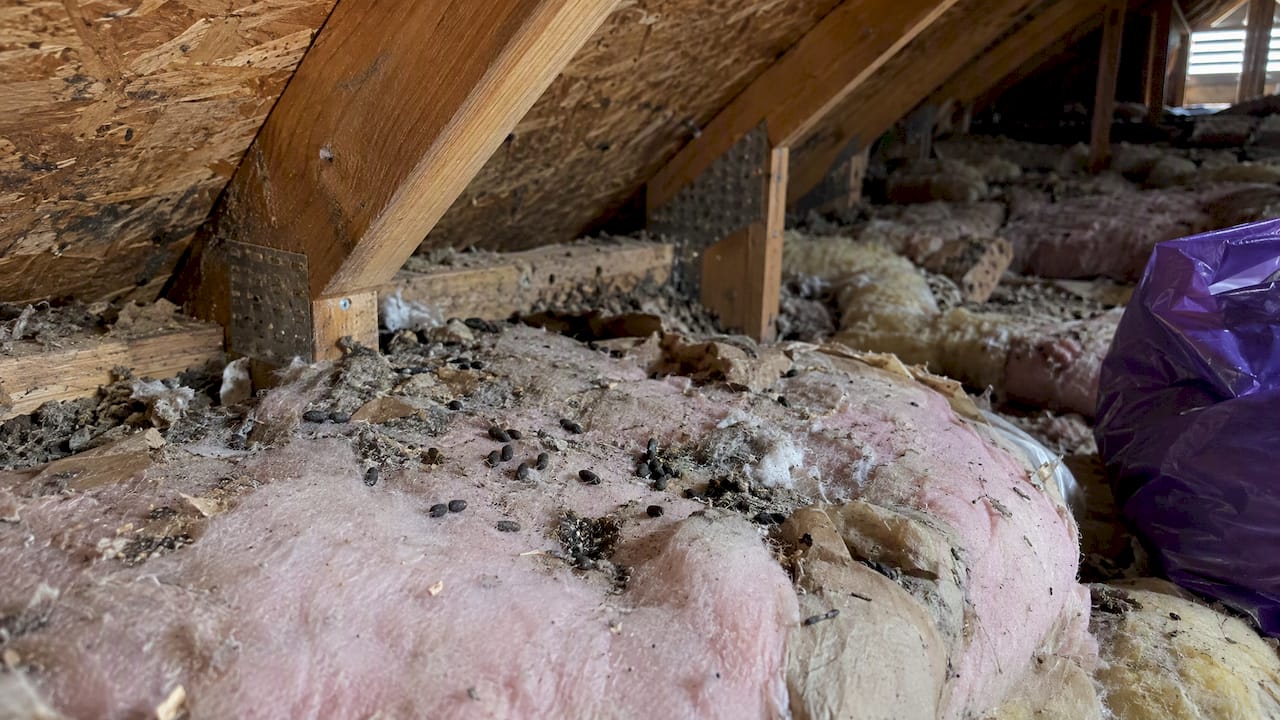
If you see a loose, pebble-like gray-brown material that looks like popcorn, stop and don’t disturb it. That’s a strong sign of vermiculite insulation, which can contain asbestos and needs professional testing before anyone touches it. Moisture stains, mold, or pest droppings are also your cue to call a professional rather than start topping up insulation over a problem that will keep getting worse underneath it.
Get the Installation Order Right: Seal, Vent, Then Insulate
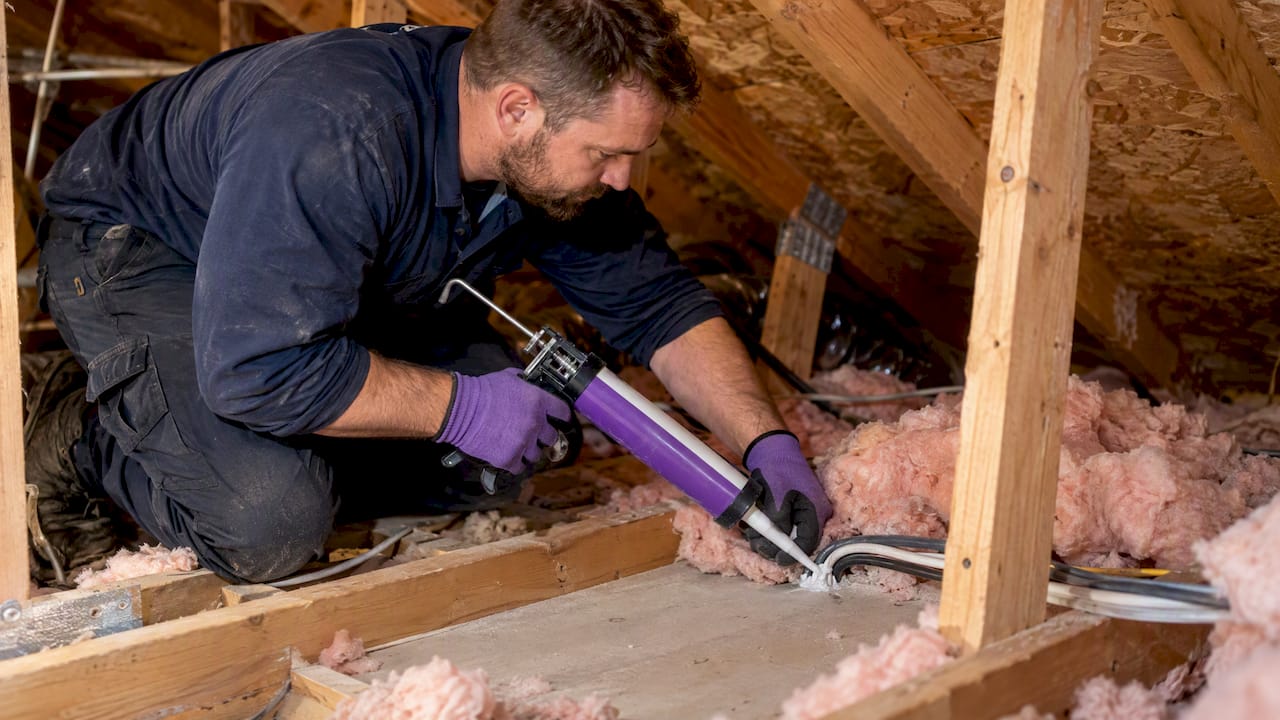
Insulation thickness only pays off if the attic floor is airtight first. Building America’s air-sealing research found that skipping this step leaves a large share of potential energy savings on the table and can even trap moisture inside the insulation, which tanks its performance over time.
Common air leaks worth sealing before you add a single inch of insulation:
- Gaps around the top plates where interior walls meet the attic floor
- Chimney chases and flue penetrations
- Recessed light fixtures and electrical boxes
- Plumbing stacks and bath fan ducts
Ventilation is the other half of the equation. Intake air should enter low, at the soffits or eaves, and exhaust high, at the ridge or gable vents, with baffles holding open a clear air channel so insulation never blocks the airflow path. Skimping here traps humidity, which can rot roof sheathing from the inside out.
That’s normal, not overkill.
Keep insulation pulled back at least 3 inches from chimneys and heat-producing fixtures per code, and never bury a non-IC-rated recessed light. For a deeper look at where air actually escapes, see this breakdown of common attic air leak points.
What Does It Cost, and How Fast Does It Pay Back?
Installed costs vary by material and attic size, but ballpark figures for a typical attic run from budget-friendly blown-in fiberglass or cellulose up to a higher price point for closed-cell spray foam, which costs more per square foot but adds air sealing at the same time; understanding HVAC load calculation for residential spaces can help estimate your heating and cooling needs related to insulation upgrades.
Cost drivers that move the number up or down:
- Whether old insulation needs removal first
- Attic accessibility and roof framing complexity
- Local labor rates and material choice
- Whether air sealing is bundled into the job
ENERGY STAR’s modeling puts average savings from air sealing and insulating attics and related areas at about 15% off annual heating and cooling costs for a typical home. That figure moves depending on your climate and how leaky the house was to begin with. A drafty older home in a cold climate will see a bigger swing than a newer, tighter home in a mild one.
A simple payback estimate looks like this: take your project cost, divide it by your estimated annual energy savings, and you get years to payback. Homes heating with propane or oil, homes in harsher climates, and homes with major existing air leaks tend to see the fastest returns, since there’s more waste to eliminate in the first place. For more ways to squeeze savings out of the space, check these whole-house attic efficiency tips.
Why Depth Alone Doesn’t Tell the Whole Story
Depth is the easy number to chase, and it’s the wrong one to chase alone. An attic can measure 14 inches of insulation and still underperform R-49 on paper if it’s compacted, wet, or riddled with air leaks the previous owner never sealed. We’ve pulled back insulation that looked fine from above and found it flattened to half its rated loft from decades of foot traffic near the access hatch.
Air sealing comes first on every job, full stop. After that, material choice comes down to clearance and budget more than any brand preference. Tight rafter bays with electrical clutter usually push us toward closed-cell spray foam, while open, obstruction-free attics do just fine with cellulose blown a little heavier than the target to cover settling. A free inspection tells you which situation you’re actually in before you spend a dollar.
— Jim
Get a Written Depth and R-Value Plan From The Attic Genius
A straightforward approach to attic insulation starts with an inspection that measures your existing depth, identifies your material, and provides a written plan naming the exact R-value target and installed depth for your home, not a generic estimate.

The plan covers whatever your attic actually needs: a top-up over existing insulation, a full upgrade, or a complete removal and reinstall if what’s up there is compacted, contaminated, or moldy. Air sealing and attic ventilation get addressed in the same visit, since insulation depth without a sealed, properly vented attic floor is money left on the table. Installations come with transparent pricing and warranty details to avoid surprise change orders.
If pest droppings, moisture, or mold turned up during your own attic check, The Attic Genius handles that cleanup and remediation too, so you’re not juggling separate contractors for one attic problem. Serving Chicagoland’s Northwest Suburbs and parts of southern Wisconsin, the team can get a free inspection on the calendar and tell you, in writing, exactly what your attic needs.
Primary Sources and References
This guide draws on ENERGY STAR’s recommended R-values, ENERGY STAR’s savings methodology, the DOE Energy Saver insulation guidance, Building America’s air-sealing measure guideline, and standard R-value depth conversion tables.
Sources
- Recommended home insulation R–values | ENERGY STAR
- Insulationrvalues
- Measure Guideline: Attic Air Sealing (Building America / DOE)
FAQ
What Is the “7 and 7” Rule for Attics?
The “7 and 7” rule refers to a rough field guideline some installers use: roughly 7 inches of certain insulation materials paired with maintaining at least 7 inches of clearance in specific vent or eave areas to preserve airflow. It’s not a formal code standard, so always check your local energy code and vent clearance rules instead of relying on this shorthand alone.
How Thick Should Attic Insulation Be?
Most homes should aim for R-49, which is about 14 inches of blown cellulose or 16 inches of blown fiberglass, based on ENERGY STAR and IECC retrofit guidance. Warm climates can target R-30, while cold northern climates should reach R-60.
Is R-19 or R-30 Better in the Attic?
R-30 is better for nearly every attic, since R-values below the R-30 to R-60 range that current retrofit guidance recommends for any U.S. climate zone are not advised for attic floors. Lower R-values are more commonly used in wall cavities than in attic floors today.
Can I Put Too Much Insulation in My Attic?
Adding insulation beyond your climate zone’s recommended target generally brings diminishing energy returns rather than harm, but excess depth can bury recessed lights, block ventilation baffles, or crowd chimney clearances if not installed carefully. The bigger risk is depth without air sealing, which limits how much of that insulation’s potential you ever actually realize.
Should I Hire a Pro or Add Attic Insulation Myself?
DIY works fine for straightforward top-ups over clean, dry, unobstructed insulation with no contamination present. Call a professional if you find vermiculite, moisture, mold, or pest waste, or if your attic needs air sealing and ventilation work alongside insulation. The Attic Genius offers a free inspection to identify which situation applies to your home before any work starts.