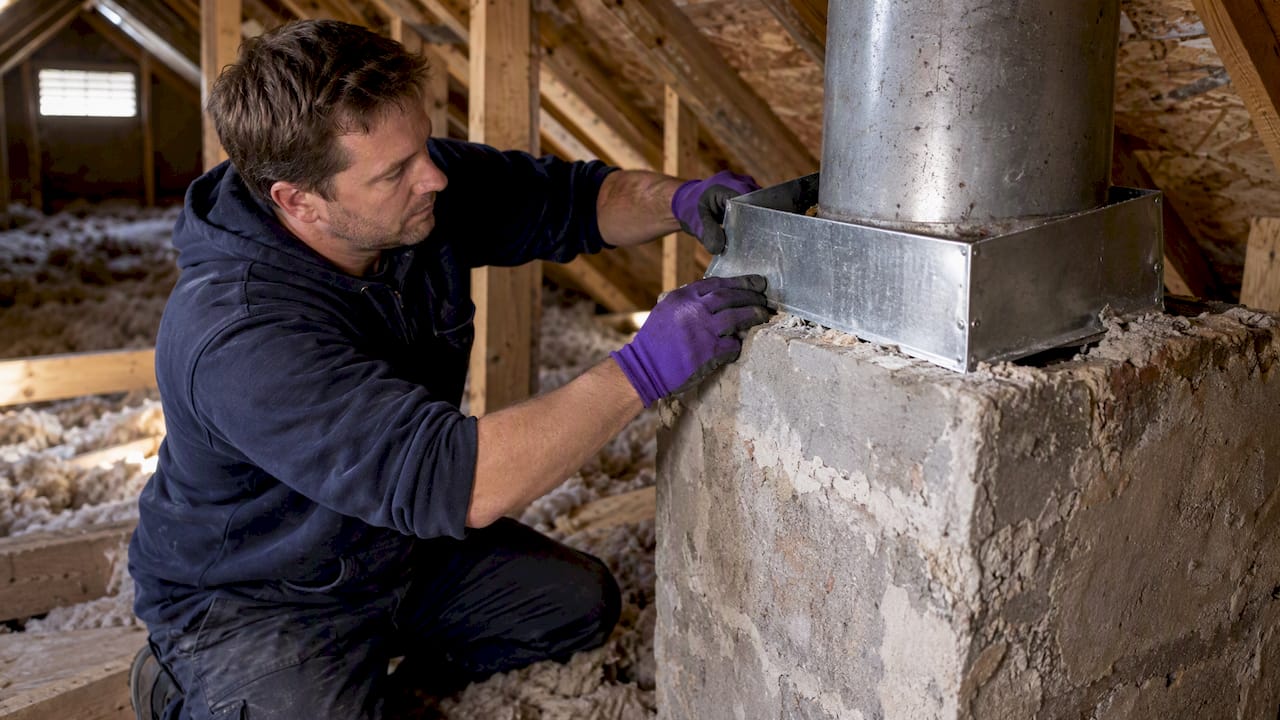

Visible mold in a crawl space indicates an active moisture problem that must be resolved, as the mold itself is a symptom of underlying water or humidity issues. Ignoring the moisture source means the mold will return, even after cleaning. While homeowners can tackle small areas under the EPA’s 10 square foot threshold, infestations exceeding this size require professional remediation to ensure proper containment and effective removal.
Any visible mold in a crawl space means you have a moisture problem, full stop. There’s no “acceptable” amount worth ignoring, no matter how small the patch looks with a flashlight. The mold itself is a symptom. The real issue underneath it is water, humidity, or both, and it needs fixing before you worry about anything else.
Until you can get eyes on the source, take a few immediate steps. Close off the crawl space access so spores don’t migrate into living areas, and skip painting or bleaching over what you see. That just hides the problem while it keeps growing.
- Photograph every spot you find, with something for scale
- Note the smell, even faint musty odors matter
- Measure or estimate the affected square footage
- Check for standing water or wet soil
Pro tip: EPA and CDC/NIOSH guidance says routine air or surface sampling isn’t necessary for most homeowners. Visible mold and a moisture source are enough information to act on.
Key Takeaways
Visible crawl space mold always signals an active moisture problem, and fixing that source matters more than the cleaning method you choose.
| Point | Details |
|---|---|
| Skip routine testing | Visual inspection and moisture readings guide remediation decisions better than lab sampling for most homes. |
| Know the DIY line | The EPA’s 10 square foot threshold separates safe DIY cleanup from jobs that need containment and professional equipment. |
| Moisture fix is non-optional | Vapor barriers, drainage, and dehumidification must happen alongside cleanup or the mold returns within months. |
| Health risk travels upward | Stack effect carries crawl space air into living spaces, which is why musty odors upstairs often start below the house. |
| The Attic Genius handles the full job | Offers documented inspections, containment, vapor barrier installation, and warrantied remediation across Chicagoland and southern Wisconsin. |
Table of Contents
- How Do You Spot Crawl Space Mold and Inspect Safely?
- Can Crawl Space Mold Actually Make You Sick?
- Should You Handle Crawl Space Mold Removal Yourself?
- What Are the Actual Remediation Steps for Crawl Space Mold Removal?
- How Do You Stop Crawl Space Mold From Coming Back?
- What Kind of Mold Grows in Crawl Spaces, and What Should You Watch For?
- Do Crawl Space Mold and Long-Term Exposure Cause Lasting Health Problems?
- Do You Have to Disclose Crawl Space Mold When Selling or Renting a Home?
- How The Attic Genius Approaches Crawl Space Mold
- The Homeowner Mistake Nobody Warns You About
- Ready to Deal With Your Crawl Space for Good?
- Where to Read More on Crawl Space Mold
- Sources
How Do You Spot Crawl Space Mold and Inspect Safely?
Mold in a crawl space usually shows up as black, white, or greenish patches on floor joists, the rim board, subfloor insulation, or ductwork. Texture matters as much as color. Fuzzy or slimy growth is mold; a chalky white crust on concrete or block is usually efflorescence, mineral deposits left behind by moisture, not a health threat. A persistent musty smell often means growth is happening somewhere you can’t see yet, especially behind insulation batts or under vapor barrier that’s come loose.
Before you crawl in, put on an N95 respirator at minimum, gloves, and old clothes you can wash immediately or toss. Skip the entry entirely if you see standing water, sagging joists, or signs of structural rot.
- Check relative humidity with a $15 hygrometer. Above 60% is a red flag.
- Test wood moisture content with a pin-type moisture meter. Readings over 20% invite decay and mold.
- Photograph every area of concern with the date visible.
- Note whether insulation is wet, sagging, or moldy underneath.
Skip lab testing for routine inspections. Species identification rarely changes the remediation plan, since the fix is moisture control either way. Sampling becomes worthwhile mainly in real estate transactions or insurance disputes where a documented report is required.
Can Crawl Space Mold Actually Make You Sick?
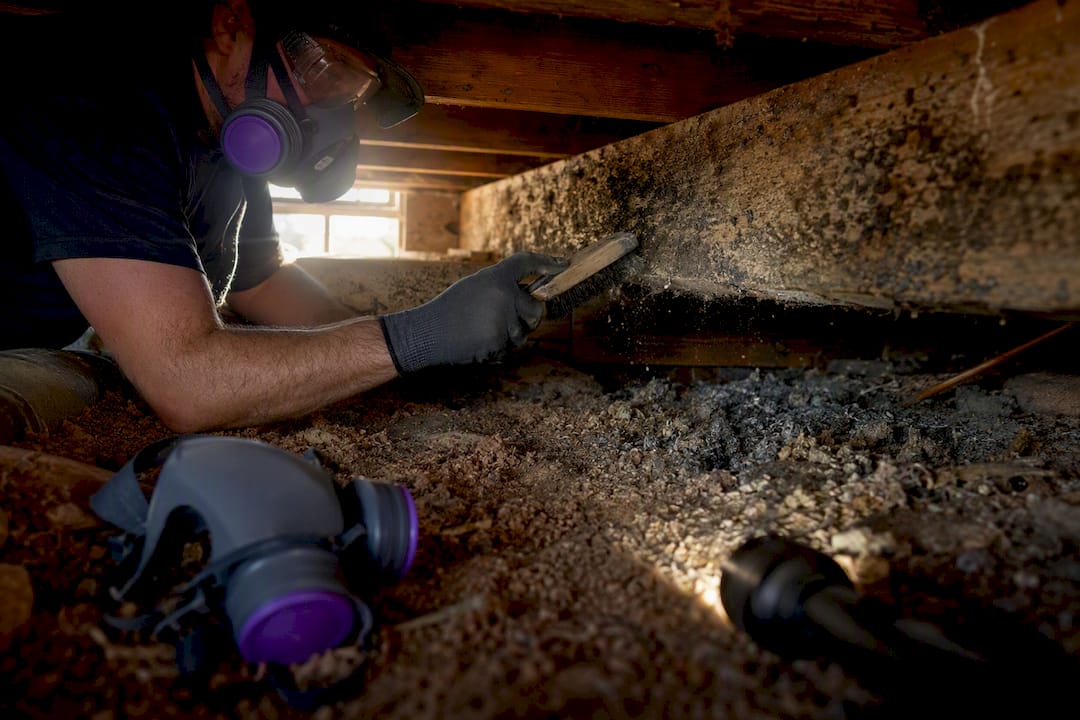
Yes, even though you rarely set foot down there. Homes act like a chimney: air from the crawl space rises through the structure into living areas, a phenomenon called the stack effect. That musty smell you notice in a first-floor closet often started two stories below.
Damp, moldy indoor environments are linked to increased respiratory symptoms, and the CDC notes the effect is worse for people with asthma or allergies. A few groups face higher stakes:
- Young children, whose airways are still developing
- Older adults with reduced lung function
- Anyone immunocompromised or with existing respiratory conditions
- People with mold allergies, who may react to even low-level exposure
Fixing the moisture source doesn’t just stop the mold. It’s the same action that protects indoor air quality for everyone in the house.
Should You Handle Crawl Space Mold Removal Yourself?
The EPA’s benchmark for DIY cleanup is 10 square feet of contamination or less. Below that, a homeowner with proper PPE and basic tools can usually manage it safely. Above it, you’re into territory where containment and equipment start to matter, and mistakes spread spores rather than contain them.
Certain conditions push a job into professional territory regardless of size:
- Standing water or a crawl space that floods repeatedly
- Wet or moldy insulation that needs full removal
- Visible wood rot or structural damage to joists
- HVAC ductwork running through the contaminated area
- A household member with asthma, allergies, or a compromised immune system
- Crawl spaces too tight or inaccessible to work in safely
Containment should match the size of the problem. Limited containment with polyethylene sheeting and negative air pressure works for 10 to 100 square feet; anything larger, or any job with a real risk of contaminating living spaces, calls for full containment.
Professional remediation typically includes documented moisture readings, HEPA filtration during removal, and a written scope with warranties. Homeowner-facing cost estimates for crawl space mold removal run from a few hundred dollars for small cleanups to several thousand for full encapsulation. Insurance rarely covers any of it. Most policies treat gradual moisture damage as a maintenance issue, not a covered loss, so prevention pays for itself twice over.
What Are the Actual Remediation Steps for Crawl Space Mold Removal?
Once you’ve decided on DIY or hired a pro, the sequence looks the same either way. Skipping a step, especially the moisture fix at the end, is how mold comes back within a season.
- Contain the area. For jobs under 100 square feet, seal the workspace with polyethylene sheeting and set up negative air pressure so spores don’t travel to the rest of the house.
- Remove porous materials that can’t be cleaned. Wet insulation, water-damaged wood, and any cardboard or paper go in sealed bags for disposal. Trying to clean and save these materials almost always fails.
- Clean hard surfaces properly. HEPA vacuum first to pull loose spores, then wipe down joists, framing, and concrete with detergent and water. An EPA-registered antimicrobial can follow, but never mix cleaning chemicals together.
- Dry the space completely. Run fans or a dehumidifier until wood moisture readings drop below 20% and relative humidity holds under 60%. Confirm the musty smell is gone before calling the job done.
- Fix the moisture source at the same time. None of the above matters if water keeps coming back through the foundation, a plumbing leak, poor grading, or a missing vapor barrier.
A few things trip up DIYers on this list more than anything else:
- Painting over mold instead of removing it, which just traps spores under a fresh surface
- Skipping the drying/verification step because the visible mold is already gone
- Using bleach and ammonia-based products together, a combination that produces toxic fumes
- Leaving new insulation without addressing the humidity that ruined the old batch
For a full walkthrough with more detail on PPE and disposal, see The Attic Genius’s guide to attic mold remediation steps, which covers the same containment and drying logic used in crawl spaces.
How Do You Stop Crawl Space Mold From Coming Back?
Cleanup without a moisture fix is a temporary win. The mold will return, often within months, if the underlying condition doesn’t change. Most persistent crawl space moisture traces back to one of four sources: bare soil releasing ground moisture into the air, condensation on ductwork or plumbing, an active leak, or poor grading that channels rainwater toward the foundation instead of away from it.
The single highest-impact fix in most homes is covering exposed dirt with a sealed vapor barrier, typically 12-mil polyethylene sheeting with seams taped and edges overlapped by at least a foot. For crawl spaces with chronic humidity or standing water history, full encapsulation, sealing walls and the floor together into one conditioned system, goes further than a barrier alone. Basement and crawl space insulation done alongside encapsulation also cuts down on the temperature swings that drive condensation.
- Target relative humidity below 60%, ideally closer to 50%
- Size a dehumidifier to the square footage, not a rough guess
- Extend downspouts at least 5 feet from the foundation
- Add a sump pump if the crawl space has a history of standing water
- Check vapor barrier seams every season for gaps or tears
Pro tip: A dedicated crawl space dehumidifier usually outperforms tying into your home’s HVAC system, since it can run independently and hold humidity steady even when the rest of the house is climate-controlled differently. For more on how dehumidifiers affect mold risk specifically, this breakdown of dehumidifiers and mold control is worth a read.
What Kind of Mold Grows in Crawl Spaces, and What Should You Watch For?
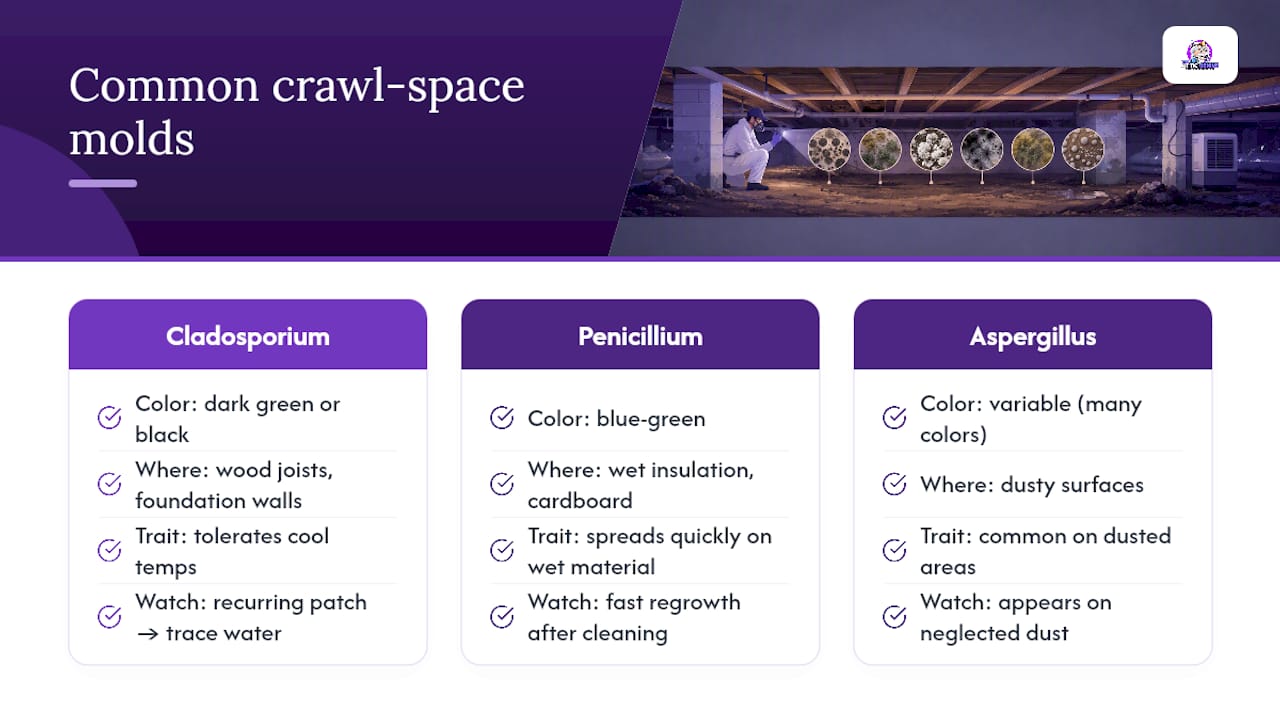
Crawl spaces tend to grow a fairly predictable cast of species, largely because the conditions down there, dark, humid, and often touching bare soil, favor the same organisms across most homes. Cladosporium shows up as dark green or black patches on wood and tends to tolerate cooler temperatures better than most mold types, which is why it’s common on joists near foundation walls. Penicillium often appears blue-green and spreads fast on wet insulation and cardboard. Aspergillus is common on dusty surfaces and can appear in a range of colors depending on the species.
None of this changes what you do about it. Identifying the exact species rarely changes the remediation plan, since every one of these grows because of the same underlying moisture, and every one of them gets removed the same way: contain, remove contaminated material, clean, dry.
Where species does matter is duration and pattern. A mold that keeps returning to the same spot after cleaning usually signals an unresolved leak or a gap in the vapor barrier right at that location, not a more aggressive organism. If you’re chasing the same patch a second or third time, stop cleaning and start tracing water. Check the plumbing line above it, the grading outside that wall, or the seam in the barrier nearest that joist. The mold is a symptom repeating itself; the fix has to target what’s actually feeding it.
Do Crawl Space Mold and Long-Term Exposure Cause Lasting Health Problems?
Short-term exposure to crawl space mold tends to produce the symptoms most people already associate with it: coughing, throat irritation, sinus congestion, and worsened allergy or asthma symptoms. The concern homeowners underestimate is what happens with exposure that continues for months or years, often because the source was never fixed, just papered over or ignored.
Chronic exposure in a damp, moldy home is tied to persistent respiratory symptoms that don’t resolve the way a short cold does. The CDC’s research on mold and health points to ongoing asthma exacerbation as one of the clearest long-term patterns, particularly in children whose asthma risk appears linked to early and sustained damp-building exposure. Adults with existing respiratory conditions can see a similar slow decline, more frequent flare-ups, reduced lung function over time, and a lower threshold for triggers that didn’t used to bother them.
The tricky part is that these effects build gradually. A household living above a moldy crawl space for years might attribute a chronic cough or seasonal allergy “getting worse” to aging or unrelated causes, when the actual driver is sitting in the joists below. That’s part of why fixing the moisture source matters even when the mold itself seems minor: the health cost isn’t measured in the visible patch, it’s measured in years of low-grade exposure that a family never connects back to the crawl space.
Do You Have to Disclose Crawl Space Mold When Selling or Renting a Home?
Disclosure rules for mold vary by state, but the general principle holds almost everywhere: if you know about a material defect, including known mold contamination, and you don’t tell a buyer or tenant, you’re exposed to legal liability if it surfaces later. Most states require sellers to disclose known material defects on standard disclosure forms, and mold is increasingly listed as its own line item rather than buried under general “moisture issues” language.
For sellers, this creates a real incentive to fix crawl space mold before listing rather than after an inspection flags it. A buyer’s inspector will typically check the crawl space, and a documented mold history without a matching remediation record tends to slow negotiations, trigger price reductions, or kill deals outright. Attic and crawl space condition also factors into pre-sale insulation decisions, since buyers and inspectors both look at the whole envelope, not just the visible mold.
For landlords, several states impose specific mold disclosure or remediation obligations tied to habitability standards, and a tenant with a documented health condition worsened by mold exposure has grounds for legal action in many jurisdictions. Neither sellers nor landlords should rely on informal assurances or paint-over fixes. A written remediation record, ideally with moisture readings before and after, protects you in a way that a verbal “it’s handled” never will. When in doubt about your state’s specific disclosure requirements, a real estate attorney is a better resource than a general guide like this one.
How The Attic Genius Approaches Crawl Space Mold
The Attic Genius handles moisture and mold remediation across the greater Chicagoland area, backed by 25+ years of combined team experience and 400+ five-star reviews from local homeowners. Crawl space mold rarely shows up alone. It’s usually paired with poor ventilation, missing insulation, or a vapor barrier that was never installed correctly in the first place.
A professional visit typically includes:
- Documented humidity and wood moisture readings at multiple points
- A written scope of work with a specific estimate, not a verbal ballpark
- Recommended fixes ranked by priority, moisture source first
- A realistic timeline for containment, removal, and drying
- A written warranty on completed remediation work
| What You Get | Why It Matters |
|---|---|
| Inspection with moisture data | Confirms the actual RH and wood moisture levels driving the mold |
| Written scope and estimate | No surprise costs once the containment work starts |
| Vapor barrier and encapsulation options | Addresses the bare-soil humidity source directly |
| Dehumidification sizing | Matches equipment to your specific crawl space, not a generic unit |
| Warranty on completed work | Protection if the same spot resurfaces |
If your crawl space has crossed the 10-square-foot DIY threshold, or if you’re just not confident handling containment and disposal yourself, that’s the point to bring in a professional attic and crawl space assessment.
What is the Biggest Homeowner Mistake in Crawl Space Mold Remediation?
The biggest homeowner mistake in crawl space mold remediation is underestimating the discipline required after cleanup, specifically verifying dryness and identifying the actual moisture source. Most advice on crawl space mold treats the cleanup as the hard part, but scrubbing joists and bagging wet insulation is straightforward. Homeowners consistently underestimate verifying dryness, checking vapor barrier seams every season, and resisting the urge to declare victory the moment visible mold disappears. Mold you can see is downstream of a moisture problem you usually can’t see without a hygrometer and a moisture meter. Skipping that verification step often leads to a repeat performance in six to twelve months because the water never stopped coming. Prioritizing figuring out where the water is actually coming from before touching anything is crucial, as a vapor barrier installed over an unidentified source is a Band-Aid, not a fix. Get the moisture diagnosis right first, and the remediation part becomes almost easy by comparison.
Conventional advice leans hard on “just clean it and it’s done.” That’s incomplete. Mold you can see is downstream of a moisture problem you usually can’t see without a hygrometer and a moisture meter. Skip that verification step and you’ve bought yourself a repeat performance in six to twelve months, often in the exact same spot, because the water never stopped coming.
If I had to prioritize one thing for a homeowner staring at a moldy joist right now, it wouldn’t be the cleaning method. It would be figuring out where the water is actually coming from before touching anything. A vapor barrier installed over a source you haven’t identified is a Band-Aid, not a fix. Get the moisture diagnosis right first, and the remediation part becomes almost easy by comparison.
— Jim
How Can The Attic Genius Help Deal With Crawl Space Mold for Good?
Small mold patches are one thing. But once you’re past that 10-square-foot DIY line, or once you’ve cleaned the same spot twice, the smarter move is a professional scope, not another round of bleach and hope. The Attic Genius handles the full sequence in one visit: moisture diagnosis, containment, removal, and the vapor barrier or encapsulation work that actually stops the problem from coming back.

What sets a proper remediation visit apart from a weekend DIY attempt is the documentation. You get actual humidity and wood moisture readings, not guesses, plus a written scope and estimate before any work starts. That paper trail matters later too, especially if you’re selling within the next few years and need proof the issue was resolved correctly. The Attic Genius’s moisture and mold remediation service covers inspection through encapsulation for homeowners across Chicagoland and southern Wisconsin, with upfront pricing and a written warranty on the finished work. Same-day inspections are available if you want eyes on the problem before it gets worse. Request your assessment and get a real number instead of a guess.
Where to Read More on Crawl Space Mold
- CDC guidance on mold testing and remediation
- CDC on mold and health effects
- EPA’s mold web course on crawl space moisture
- NIOSH/CDC Dampness and Mold Assessment Tool (DMAT)
This article is general information, not a substitute for advice from a qualified doctor. Consult a qualified healthcare professional about your own circumstances before acting on anything here.
Sources
- Mold, Testing, and Remediation | CDC
- Mold and Health | CDC
- Mold web course — EPA
- Mold remediation guide — EPA (Chapter 3)