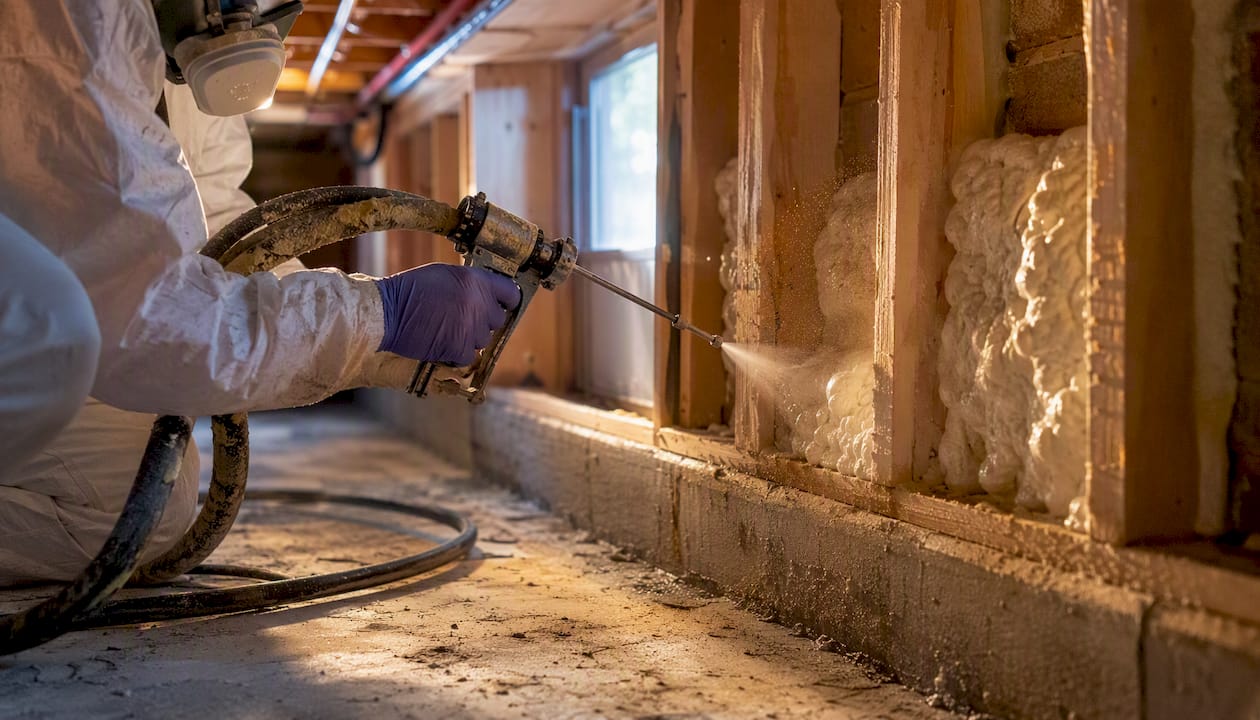
Expect to pay several dollars per linear foot for professionally installed rim joist insulation, or a few hundred to a few thousand dollars for a typical single-story home’s full perimeter. Closed-cell spray foam sits at the top of that range and is usually the right call for basements and crawlspaces because it seals air leaks and blocks moisture in one step. Rigid foam board costs less in materials but takes more labor to cut and fit around wiring and pipes, which narrows the savings more than most homeowners expect.
- Closed-cell spray foam is typically at the higher end of the price range, best for cold climates and long-term moisture control. Rigid foam board generally has a lower material cost but is more labor-intensive. Fiberglass batts alone have the lowest upfront cost but are not recommended without a foam layer due to condensation risk.
Key Takeaways
Closed-cell spray foam costs more upfront than rigid foam or fiberglass but typically delivers the lowest long-term risk because it combines insulation with air sealing in a single, moisture-resistant layer.
| Point | Details |
|---|---|
| Typical cost range | Professional rim joist insulation runs $3 to $9 per linear foot, or $600 to $2,500 for most homes. |
| Best default material | Closed-cell spray foam offers the strongest air seal and lowest condensation risk for basements. |
| Skip fiberglass alone | Fiberglass batts alone at the rim joist invite hidden condensation and mold behind the wall. |
| DIY has real limits | Spray foam kits save money but risk uneven coverage; hire a pro for complex access or wiring. |
| Get a real quote | The Attic Genius prices by your actual perimeter and offers written warranties on rim joist work. |
Table of Contents
- Rim Joist Insulation Cost Breakdown: What Drives the Price
- Comparing Rim Joist Insulation Materials
- DIY Kits vs. Hiring a Rim Joist Insulation Pro
- How Rim Joist Insulation Gets Installed
- Why Fiberglass Alone Invites Hidden Moisture Problems
- Sample Rim Joist Insulation Budgets by Home Size
- Signs Your Rim Joist Needs Insulation Now
- Do You Need a Permit to Insulate a Rim Joist?
- How Long Different Rim Joist Insulation Materials Last
- A Local Pro’s Take on Rim Joist Insulation
- Get an Accurate Rim Joist Insulation Estimate
- Frequently Asked Questions
- Sources
Rim Joist Insulation Cost Breakdown: What Drives the Price
Contractors typically quote rim joist work by the linear foot of perimeter, though DIY spray foam kits are priced by board-foot yield instead. A small ranch might have 100 to 130 linear feet of rim joist to cover; a two-story colonial can run 200 to 300 feet once you count both floor levels.
Several factors swing the price on your quote:
- Total perimeter footage — more linear feet means more material and labor, obviously, but the relationship isn’t perfectly linear once a crew is already on-site.
- Joist depth — deeper joists (common in older homes with dimensional lumber) need more foam thickness to hit R-value targets.
- Access difficulty — a wide-open unfinished basement is fast work; a crawlspace with 18 inches of clearance is not.
- Removal of existing insulation — pulling out old, moldy, or compressed fiberglass adds labor before any new material goes in.
- Obstructions — plumbing, electrical runs, and ductwork near the rim joist slow down spray application and cutting.
- Climate zone — colder regions often call for thicker foam or higher R-value targets, which raises material cost.
For a rough sample calculation: a home with a medium-sized rim joist perimeter, quoted at a moderate price per foot for closed-cell spray foam, can cost over a thousand dollars before any removal or complex-access adders. Rigid foam on that same run costs somewhat less, but that number increases if the installer has to notch around multiple pipe penetrations.
DIY two-component spray foam kits offer a cheaper entry point. A 200 board-foot kit historically runs $300 to $400, which can cover a modest rim joist run at 1 to 2 inches of thickness. That sounds like a bargain until you factor in protective gear, disposal of old insulation, and the real risk of missed spots that a pro would catch.
Comparing Rim Joist Insulation Materials
Every material on this list solves the R-value problem. Only some of them solve the air-sealing and moisture problem, and that second part is where rim joists actually fail.
| Material | R-value per inch | Air sealing | Moisture risk | Cost posture |
|---|---|---|---|---|
| Closed-cell spray foam | R-6 | Excellent | Low | High |
| Open-cell spray foam | R-3 to R-4 | Good | Moderate | Medium |
| Polyiso rigid foam | R-6 | Good (with taped seams) | Low | Medium |
| XPS rigid foam | ~R-5 | Good (with sealed edges) | Low | Medium |
| EPS rigid foam | R-3 | Fair | Low to moderate | Low to medium |
| Fiberglass batts | R-3 to R-4 | Poor | High | Low |
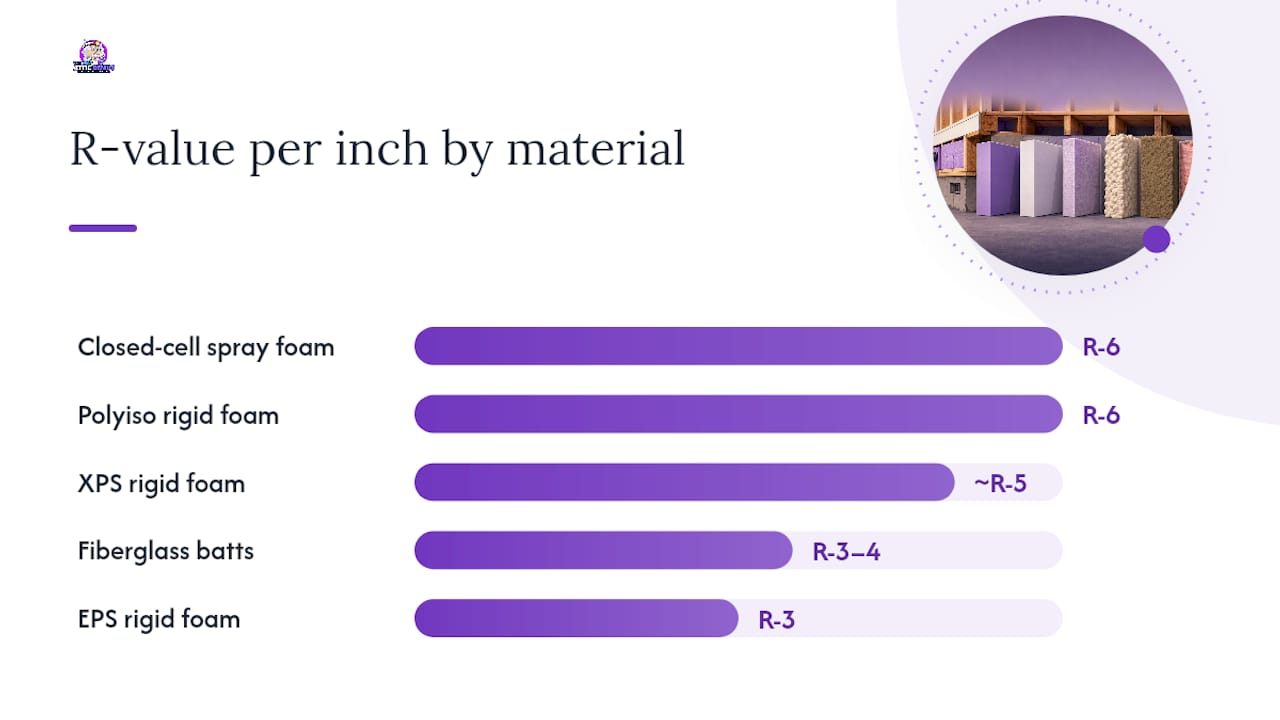
Rigid foam thickness recommendations generally call for 3 to 4 inches in cold climates and 2 inches in milder ones, since polyiso, XPS, and EPS all perform differently per inch.
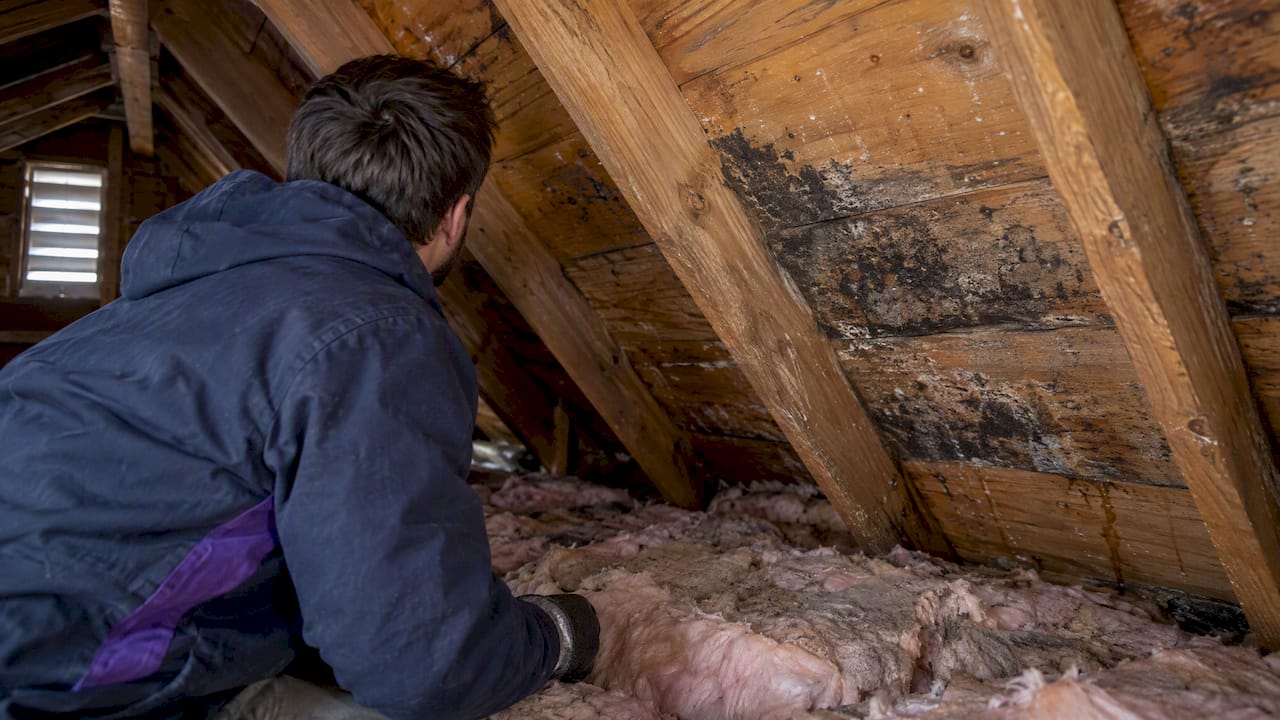
Fiberglass batts alone are a mistake at the rim joist. They’re air-permeable, so warm, humid indoor air passes straight through and condenses against the cold sheathing behind it, which is exactly how hidden mold and wood rot get started. Fine Homebuilding’s installation guidance is blunt about this: rigid foam or spray foam should be doing the air-sealing work, with fiberglass only as a supplemental layer if it’s used at all.
- Choose closed-cell spray foam for unconditioned basements in cold climates, tight or irregular cavities, or when you want the air barrier and insulation done in one pass.
- Choose rigid foam board when the space is open and accessible, budget is tighter, and you have a crew willing to do careful cut-and-seal work.
- Avoid fiberglass alone anywhere near the rim joist unless it’s backed by a continuous foam layer.
Pro Tip: If your rim joist has pipes, wires, and ductwork crowding the cavity, spray foam almost always wins on total installed cost once you account for the labor hours rigid foam requires to notch around obstacles.
DIY Kits vs. Hiring a Rim Joist Insulation Pro
A 200 board-foot DIY spray foam kit at $300 to $400 sounds like an easy way to cut your rim joist insulation cost in half. It can work for a small, accessible basement. It gets riskier fast once obstructions, ceiling height, or square footage grow past what a homeowner can comfortably reach and coat evenly.
- DIY spray foam kits: lowest material cost, but uneven coverage and thin spots are common on a first attempt.
- DIY rigid foam: affordable and low-risk from a safety standpoint, though cutting tight, gap-free seams around irregular framing takes real patience.
- Professional spray foam: highest upfront cost, fastest install, most complete air seal, and typically backed by a warranty.
Spray foam off-gasses during and after application, so proper respirators, ventilation, and skin protection aren’t optional. Hire a pro when you’re dealing with knob-and-tube wiring, finished ceilings nearby, or a home where the thermal barrier requirements for exposed foam actually matter for code compliance.
Pro Tip: A rushed DIY job that leaves gaps at the sill plate defeats the whole purpose. Air sealing has to be continuous, or the humid air just finds the next weak spot.
How Rim Joist Insulation Gets Installed
A professional rim joist job generally follows the same sequence, whether you’re getting spray foam or rigid foam installed:
- Inspection and moisture check — the crew looks for existing water intrusion, rot, or active leaks before covering anything up.
- Prep and removal — old fiberglass batts, dust, and debris come out first.
- Air sealing critical gaps — the sill plate, foundation-to-rim-joist junction, and any penetrations get sealed first.
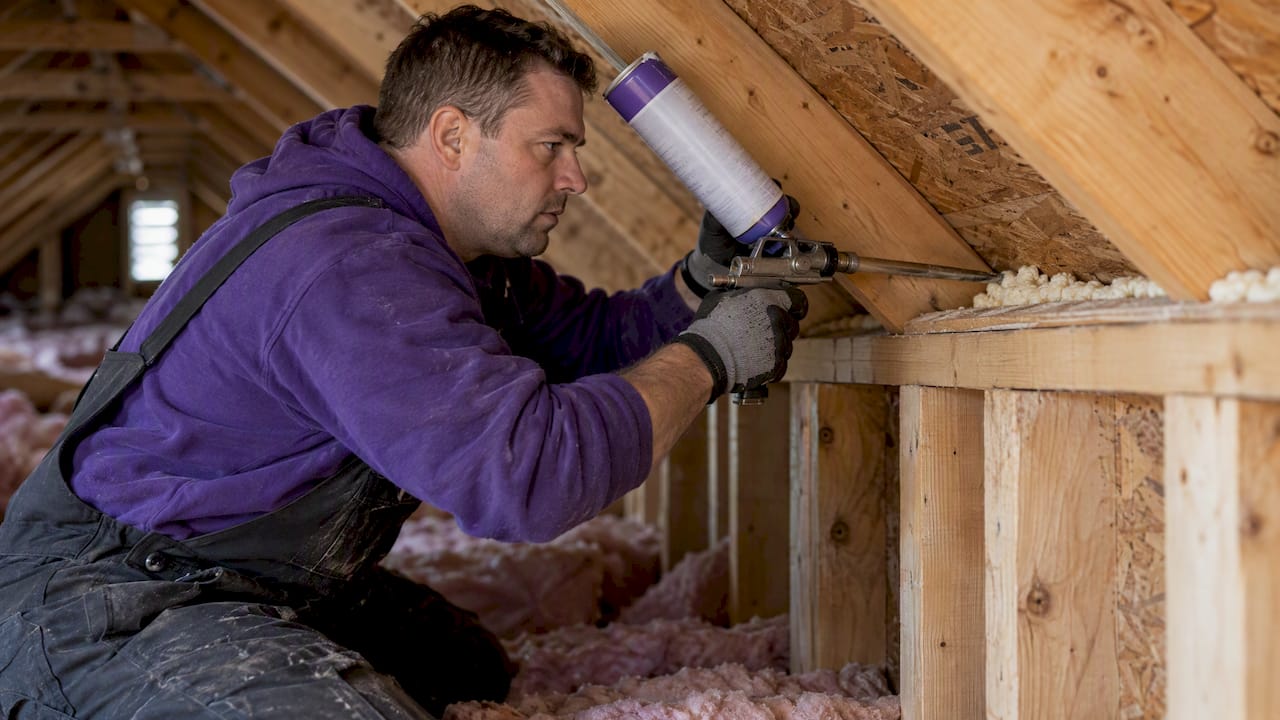
- Material installation — spray foam is applied directly, or rigid foam is cut, fitted, and sealed at the seams.
- Trimming and finish — excess foam gets trimmed flush for a clean appearance.
- Cleanup and disposal — old insulation and debris are hauled away.
Before an installer arrives, clear a path to the rim joist area, move stored items away from the walls, and note any spots where you’ve noticed drafts or moisture. A typical accessible basement rim joist job usually takes several hours, varying with perimeter length and prep work required.
Why Fiberglass Alone Invites Hidden Moisture Problems
Rim joists sit at one of the most workmanship-sensitive junctions in a house, where the foundation, sill plate, floor framing, and sheathing all meet. That’s also exactly why they’re often the single biggest source of uncontrolled air leakage in a home.
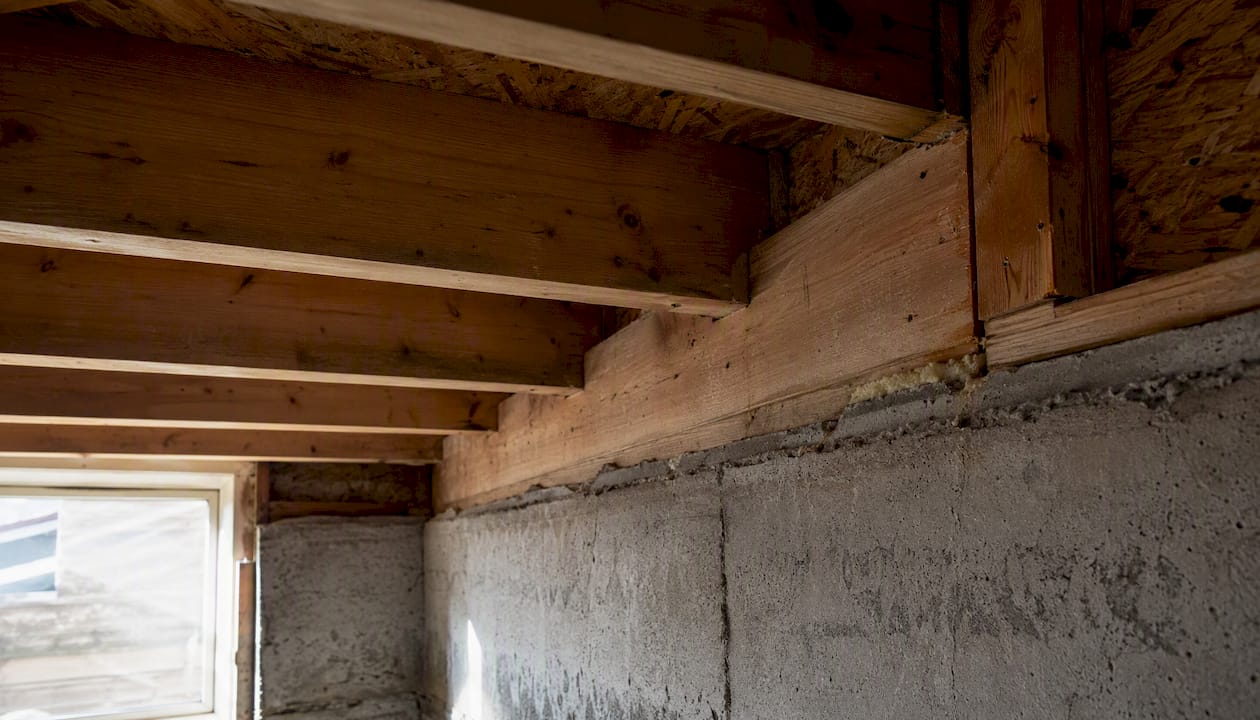
Fiberglass batts let warm, moist indoor air pass straight through to the cold sheathing behind them, and PHRC/Penn State’s durability evaluation confirms that low-air-permeable materials like closed-cell foam raise the interior surface temperature enough to cut that condensation risk substantially. Foam acts as a “throttle” on vapor movement, controlling how much moisture reaches cold surfaces in the first place.
Code guidance matters here too. DOE’s rim joist guidance specifies that for spray foam to qualify as a true air barrier, open-cell foam needs at least 5.5 inches of finished thickness, and closed-cell needs at least 1.5 inches. The IRC also requires exposed spray foam to have an approved thermal barrier (typically a code-compliant ignition barrier or drywall) unless it’s been tested otherwise, which matters for exposed basement installs.
- Inspect for existing bulk water intrusion before insulating anything
- Match foam thickness to your climate zone’s requirements, not just whatever fits
- Consider flashing and drainage details at the foundation before sealing the assembly shut
- Get a professional assessment if you already see frost or staining on the rim joist in winter
Stacking air-impermeable layers on both sides of the assembly without a drying path is its own hazard. That’s a design detail worth discussing with an installer rather than guessing at.
Sample Rim Joist Insulation Budgets by Home Size
| Scenario | Linear feet | Estimated cost range |
|---|---|---|
| Small ranch, easy access | 100 to 130 ft | $600 to $1,000 |
| Typical two-story home | ~200 to 300 ft | $1,200 to $2,500 |
| Complex job (obstructions, removal, finished ceilings) | ~200 to 300 ft | $2,000 to $4,000+ |
The complex-job jump comes from real adders: removing failed old insulation, addressing existing mold, or working around finished basement ceilings that limit access. If you’re already planning other insulation or air-sealing work, bundling the rim joist into that same visit often reduces the per-project overhead versus scheduling it separately. Some utility companies and local energy programs offer rebates for air-sealing improvements, so it’s worth asking before you assume the full cost is on you.
Signs Your Rim Joist Needs Insulation Now
Cold air seeping through an uninsulated rim joist shows up as cold floors on the first level, uneven heating between rooms, and a basement or crawlspace that never quite feels dry. In winter, frost or condensation on the rim joist itself is a clear red flag that warm, moist air is meeting a cold surface.
- Drafts you can feel near baseboards on the first floor
- Noticeably higher heating bills compared to similar-sized homes
- Visible frost, moisture, or musty smell along the rim joist in cold months
- Pests finding their way in through gaps at the foundation-to-framing junction
Sealing and insulating that perimeter reduces drafts and stabilizes floor temperatures, and it closes off entry points pests use to get inside. Exact payback period depends on your climate, energy prices, and how leaky the rest of your home’s envelope already is, but the comfort improvement is usually noticeable within the first heating season.
Do You Need a Permit to Insulate a Rim Joist?
Most rim joist insulation jobs don’t require a separate permit on their own, since it’s typically treated as a minor insulation improvement rather than structural work. That said, requirements vary by municipality, and it’s worth a quick call to your local building department before hiring anyone, especially for spray foam.
Where permits or inspections do come into play is around the thermal barrier requirement in the IRC for exposed spray foam in habitable or accessible spaces. If your basement is unfinished and the foam will remain exposed rather than covered by drywall, some jurisdictions require an approved ignition barrier coating or a code-compliant covering. A licensed insulation contractor should know your local interpretation of this rule and can confirm whether your specific setup needs anything beyond the install itself.
Larger projects that combine rim joist work with broader basement finishing, structural repairs, or mold remediation are more likely to trigger permit requirements, since those additional scopes carry their own code obligations. If your rim joist insulation is part of a bigger renovation, ask your contractor to confirm what falls under the general building permit versus what’s exempt. Getting this wrong doesn’t usually cause problems during installation, but it can surface later during a home sale inspection or insurance claim if the work wasn’t documented properly.
How Long Different Rim Joist Insulation Materials Last
Closed-cell spray foam is essentially a permanent installation. Once it’s cured and properly sealed against the framing, it doesn’t sag, settle, or lose R-value over time the way some materials can, and it typically outlasts the structure itself without maintenance.
Rigid foam board holds up well too, provided the seams were taped and sealed correctly at installation. The main long-term risk isn’t the foam degrading. It’s small gaps at the edges opening up slightly as the house settles, which can reintroduce the air leakage the foam was meant to stop. A periodic visual check every few years, especially after any foundation movement, catches this early.
Fiberglass batts are the material most likely to need attention down the road. They compress over time, especially if they’ve absorbed any moisture, and compressed fiberglass loses a meaningful chunk of its rated R-value. If fiberglass was used alone at a rim joist (against the recommendations above), it’s also the material most likely to be hiding mold growth behind it, since it doesn’t stop the humid air that causes condensation in the first place.
None of these materials need active maintenance in the way a furnace filter does. The real durability variable is installation quality, not the material choosing to degrade on its own.
A Local Pro’s Take on Rim Joist Insulation
We see the same pattern on rim joist inspections across Chicagoland: fiberglass batts stuffed in decades ago, compressed, and doing almost nothing. Our default recommendation is closed-cell spray foam for basements and rigid foam where access makes spray impractical. With 25+ years of combined experience and 400+ five-star reviews, we back every job with upfront pricing and a written warranty. Ask us for a perimeter-based estimate.
Get an Accurate Rim Joist Insulation Estimate
Reading cost ranges only gets you so far. Every rim joist has a different perimeter, joist depth, and set of obstructions, and the only way to know your real number is a walkthrough. The Attic Genius handles inspections, closed-cell and open-cell spray foam installs, rigid foam board, old insulation removal, and the air sealing work that actually makes rim joist insulation pay off, all across Chicagoland and southern Wisconsin.

We quote by your actual perimeter footage and access conditions, not a generic price sheet, and every job comes with upfront pricing and a written warranty. If you’ve noticed cold floors, drafts, or frost on your rim joist this winter, book an air sealing assessment and get a real number for your home instead of a range.
Frequently Asked Questions
What is the average cost of rim joist insulation?
Most homeowners pay in the low single-digit dollars per linear foot for professional installation, with typical single-story home costs ranging in the hundreds to a few thousand dollars depending on material and access.
Is spray foam worth the extra cost over rigid foam for rim joists?
For unconditioned basements in cold climates, yes. Closed-cell spray foam’s air-sealing performance usually justifies the higher price, especially where obstructions make rigid foam labor-intensive to cut and fit.
Can I insulate my own rim joist to save money?
DIY rigid foam or a small spray foam kit can work for simple, accessible spaces. Complex layouts with wiring, plumbing, or finished ceilings nearby are better left to a professional installer.
How do I measure my rim joist for a cost estimate?
Measure the total linear footage of your home’s foundation perimeter where the rim joist sits, then note joist depth and any obstructions so a contractor can quote accurately.
Does rim joist insulation require a permit?
Usually not on its own, though exposed spray foam may need to meet local thermal barrier rules under the IRC. Check with your local building department before starting.
Sources
- Durability evaluation of insulated rim joists – PHRC/PSU
- Insulating and sealing rim joists – BSESC / DOE energy basics
- The Best Way to Insulate a Rim Joist – Green Building Advisor / Fine Homebuilding excerpt